This post may contain affiliate links. Please see my full disclosure and privacy policy for details.
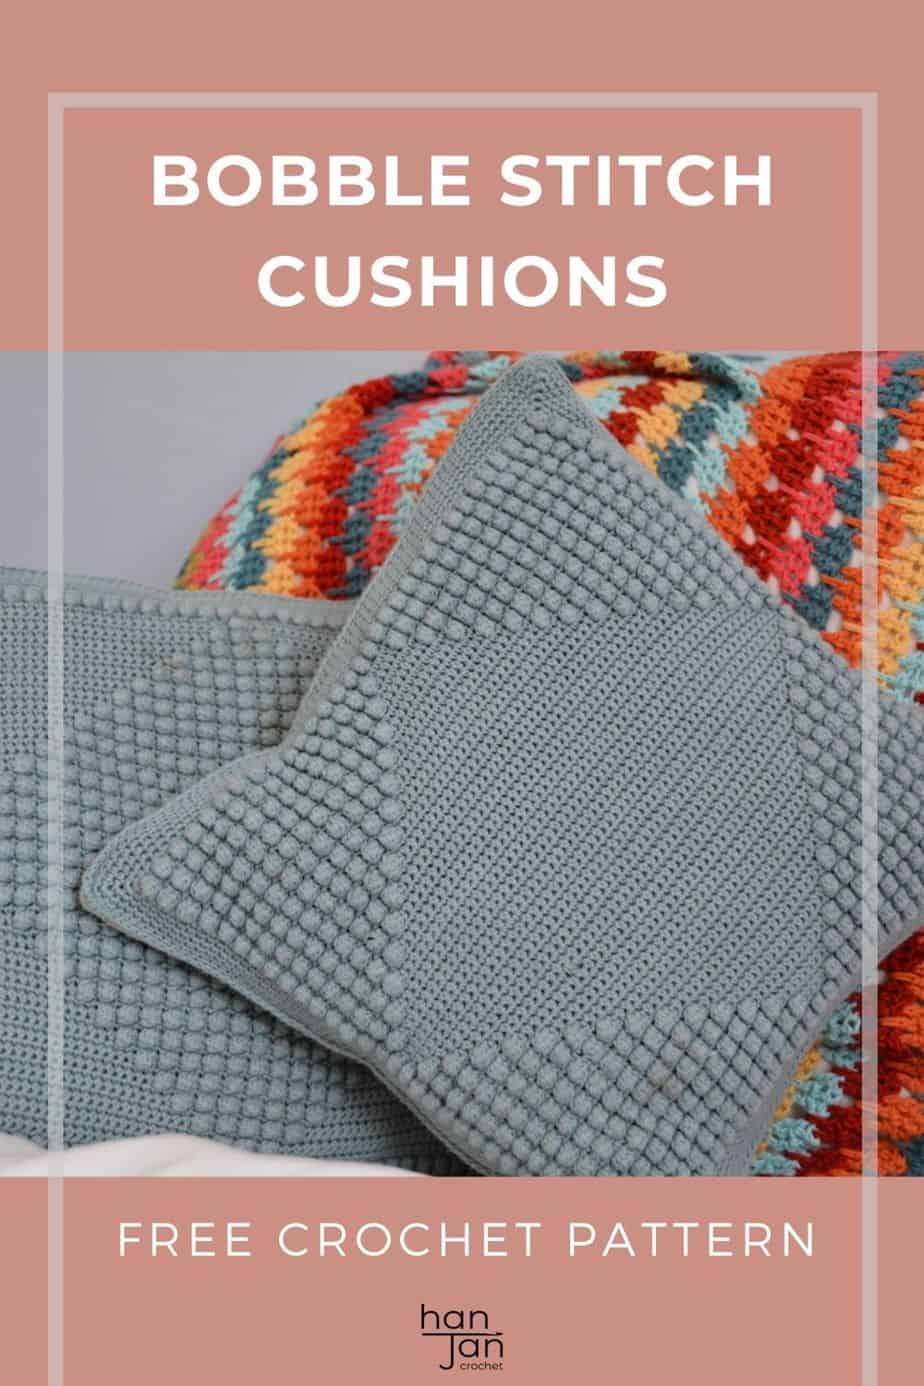
The Diamond Bobble Cushion is a great bobble stitch crochet cushion pattern for any modern home. They are packed with texture, geometry and fun. Playing with mirror images and negative spaces, the bobble designs are simple yet really striking.
Made as a panel for a crochet pillow cover to sew in place or a panel of each to encase your cushion – the choice is yours!
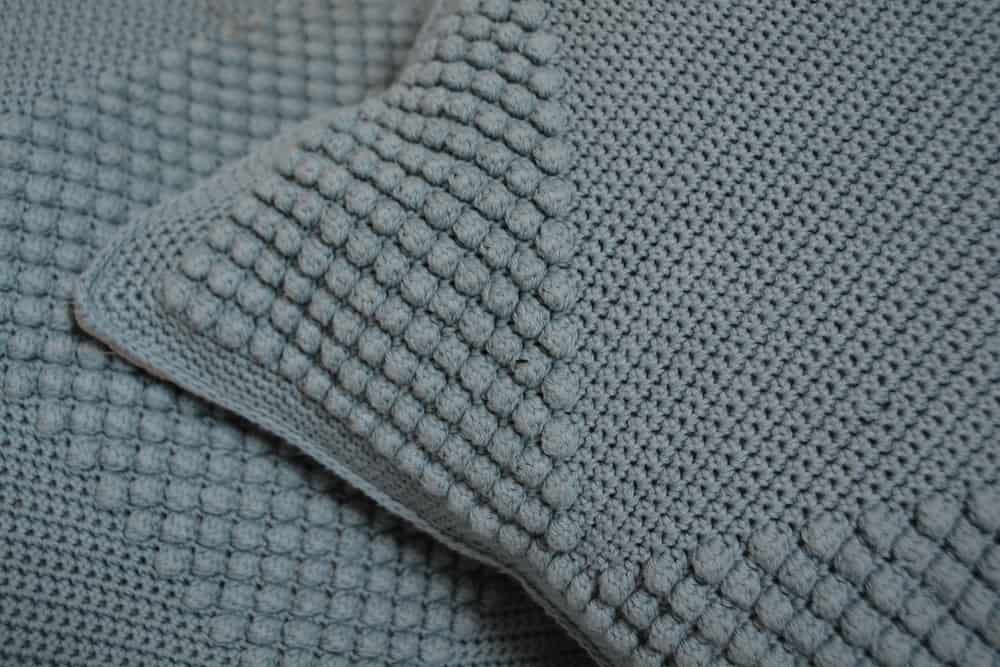
They are perfect to stretch your crochet stitch knowledge and technique, they only use single crochet (US)/ double crochet (UK) and the crochet bobble stitch to complete the look.
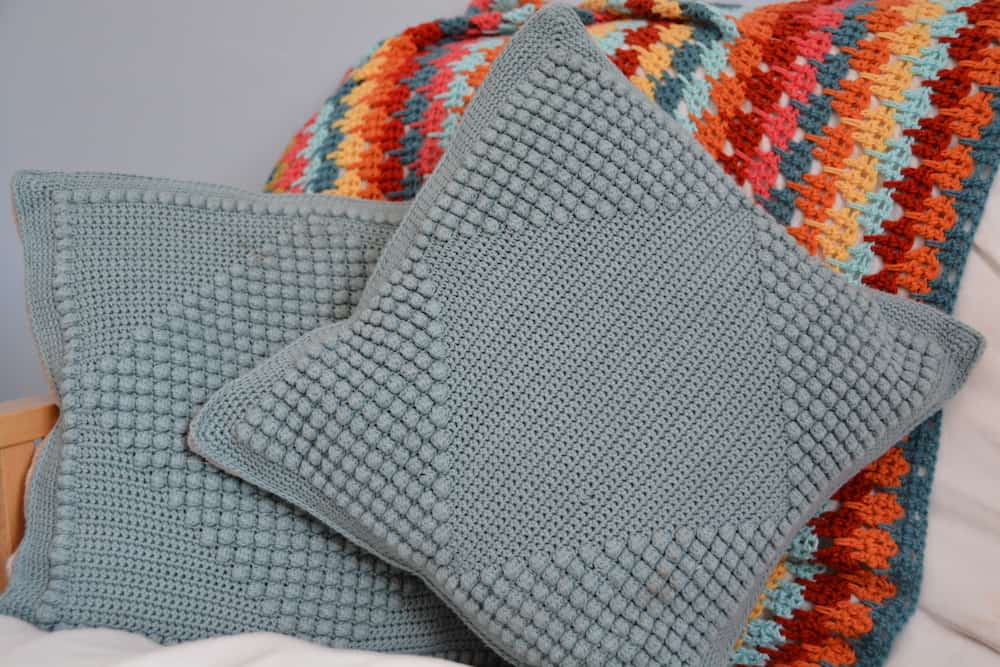
Table of Contents
This post may contain affiliate links. Please see my full disclosure and privacy policy for details.
You can carry on reading to find the free pattern here in this blogpost or purchase an ad-free, printable PDF version of the crochet cushion pattern in my pattern store to download and print.
About the bobble stitch crochet cushion pattern
Gosh it feels like an absolute age since I delved into the world of HanJan. In fact, it’s only a few months but so much has happened that it feels like forever.
A very long story short is that my husband has been extremely unwell and needed emergency brain surgery so with a six week old baby and a toddler too I literally had to ‘down tools’ and focus on our family.
I’m so happy to say that we are all doing really well now and I’m so excited to be able to get back here doing more of what I love.
So to ease me in gently I thought I’d share a really simple set of textured crochet cushion patterns with you that I designed a while back for Simply Crochet Magazine.
I have always designing and making home decor crochet patterns and we may have one, two or twenty crochet cushions in our house!
Pattern Options
This is a free crochet pattern in both UK and US terms on the blog for everyone to enjoy, just scroll down to find it.
There are a few other ways you can access and enjoy this crochet pattern:
Purchase and Print
Get the ad-free, printable PDF with added extras in my pattern stores:
Access for free >>> Scroll down to find the pattern in this blogpost.
Join and save>>> Join HanJan Crochet and receive regular discount codes (and more free patterns too!)
Pin for later >>> Pin the crochet pattern to your crochet Pinterest board.
More Crochet Pillow Patterns
Turns out I have quite a few crochet pillow patterns in my design catalogue – I had not idea I had this many! They range from lacy ones to bobble ones and even a granny square style so hopefully there’s something here for everyone to enjoy. You might also enjoy these modern crochet pillow patterns too.
As you’ll see from my crochet cushion pattern collection – I usually choose the easy route and make a front to sew onto my cushions or pillows.
This isn’t just because I’m lazy! I much prefer them like this so that you can change the decor if you want by turning them around, plus it makes them really easy to unpick and change if you ever want to wash them or start over.
Yarn
For the original design I used Erika Knight Gossypium cotton (100% cotton, 50g/100m) – 4 balls per cushion of Iced Gem (504) but I have struggled to find anywhere to source this now.
My best recommendation would be Rico Essentials Cotton DK yarn, 100% cotton, 50g/120m, which is great to work with and a lovely soft cotton for homewares.
A great alternative if you want something a bit more luxurious is CotLin DK yarn by WeCrochet. It is 70% Tanguis Cotton and 30% Linen which gives it a beautiful texture and great stitch definition, especially for homewares.
Materials
Along with your yarn, you will need the following:
- 4mm (US G) Crochet hook or hook to obtain gauge
- Tapestry needle
- Scissors
- Stitch markers if desired
- A 45x45cm (18x18in) plain cushion cover (you’ll sew the front to this)
Tension and Sizing
18st and 20 rows = 10cm by 10cm (4x4in)
The finished cushion cover measures 45x45cm
Notes
A ch1 at the beginning of a row does not count as a stitch.
Glossary/Abbreviations
ch – chain,
ss – slip stitch,
st- stitch,
sk – skip,
rep – repeat,
RS – right side,
yoh – yarn over hook
dc – double crochet, (UK terms) / sc – single crochet (US terms)
Special Stitch – Crochet Bobble Stitch
Bobble – (yoh, insert hook in st indicated, yoh and pull up loop, yoh and draw through two loops) 4 times, inserting hook in the same st each time, yoh and draw through all 5 loops on hook.
If you are a fan of bobble stitches then you’ve found the right place! I have a matching bobble stitch crochet napkin ring pattern that you can use to practise those bobbles on and get ready to make these fabulous cushions next.
Another great idea is my bobble stitch blanket pattern that uses just a few rows of bobble stitches with some clever colour changes to make it look much trickier than it actually is.
And if you’ve fallen in love with the bobble stitch, check out these free bobble stitch crochet patterns for more inspo!
Pattern
In standard UK terms.
To unlock Exclusive Content on the HanJan Crochet Blog, all you need to do is click the box below and the Grow.me app will pop up, allowing you to enter your email and create a password.
Once you’ve created an account, every time you see Exclusive Content on my blog (or any others that use Grow), simply login to your Grow account. Be sure to switch to the login screen to enter your login credentials.
If you forget your password, click the “forgot password” link and follow the prompts. Please note that I’m unable to assist with resetting Grow passwords or accessing your Grow account, so be sure to save your login information in a safe place.
Thank you for subscribing and for joining me at HanJan Crochet! I hope you enjoy the exclusive content available on the site and I can’t wait to see what you create 🙂
Row 34: Repeat Row 32
Row 36: Repeat Row 30
Row 38: Repeat Row 28
Row 40: Repeat Row 26
Row 42: Repeat Row 24
Row 44: Repeat Row 22
Row 46: Repeat Row 20
Row 48: Repeat Row 18
Row 50: Repeat Row 16
Row 52: Repeat Row 14
Row 54: Repeat Row 12
Row 56: Repeat Row 10
Row 58: Repeat Row 8
Row 60: Repeat Row 6
Row 62: Repeat Row 4
Row 64: Repeat Row 2
Row 65: Repeat Row 3. Fasten off.
Cushion edging –
Round 1: With RS facing, join yarn to any corner st of cover, ch1, 3dc in corner, dc in each st and row end around working 3dc in each corner, ss in first to join
Rounds 2-6: ch1, dc in each st around, working 3dc in each corner, ss in first to join
To make up – Block the cushion front to size and sew securely to the cushion.

Cushion Two – Outer Triangle Bobbles
Row 34: Repeat Row 32
Row 36: Repeat Row 30
Row 38: Repeat Row 28
Row 40: Repeat Row 26
Row 42: Repeat Row 24
Row 44: Repeat Row 22
Row 46: Repeat Row 20
Row 48: Repeat Row 18
Row 50: Repeat Row 16
Row 52: Repeat Row 14
Row 54: Repeat Row 12
Row 56: Repeat Row 10
Row 58: Repeat Row 8
Row 60: Repeat Row 6
Row 62: Repeat Row 4
Row 64: Repeat Row 2
Row 65: Repeat Row 3
Cushion edging –
Round 1: With RS facing, join yarn to any corner st of cover, ch1, 3dc in corner, dc in each st and row end around working 3dc in each corner, ss in first to join
Rounds 2-6: ch1, dc in each st around, working 3dc in each corner, ss in first to join
To make up – Block the cushion front to size and sew securely to the cushion.

Join HanJan and Share Your Crochet!
I’d love to stay connected with you so please do sign up for my subscriber list if you’d like to. Looking forward to hearing from you and sending you your free gift!
Thank you so much for being here to share in my free crochet patterns and supporting my blog. It’s such an honour to be able to create and share my craft with you.
