This post may contain affiliate links. Please see my full disclosure and privacy policy for details.
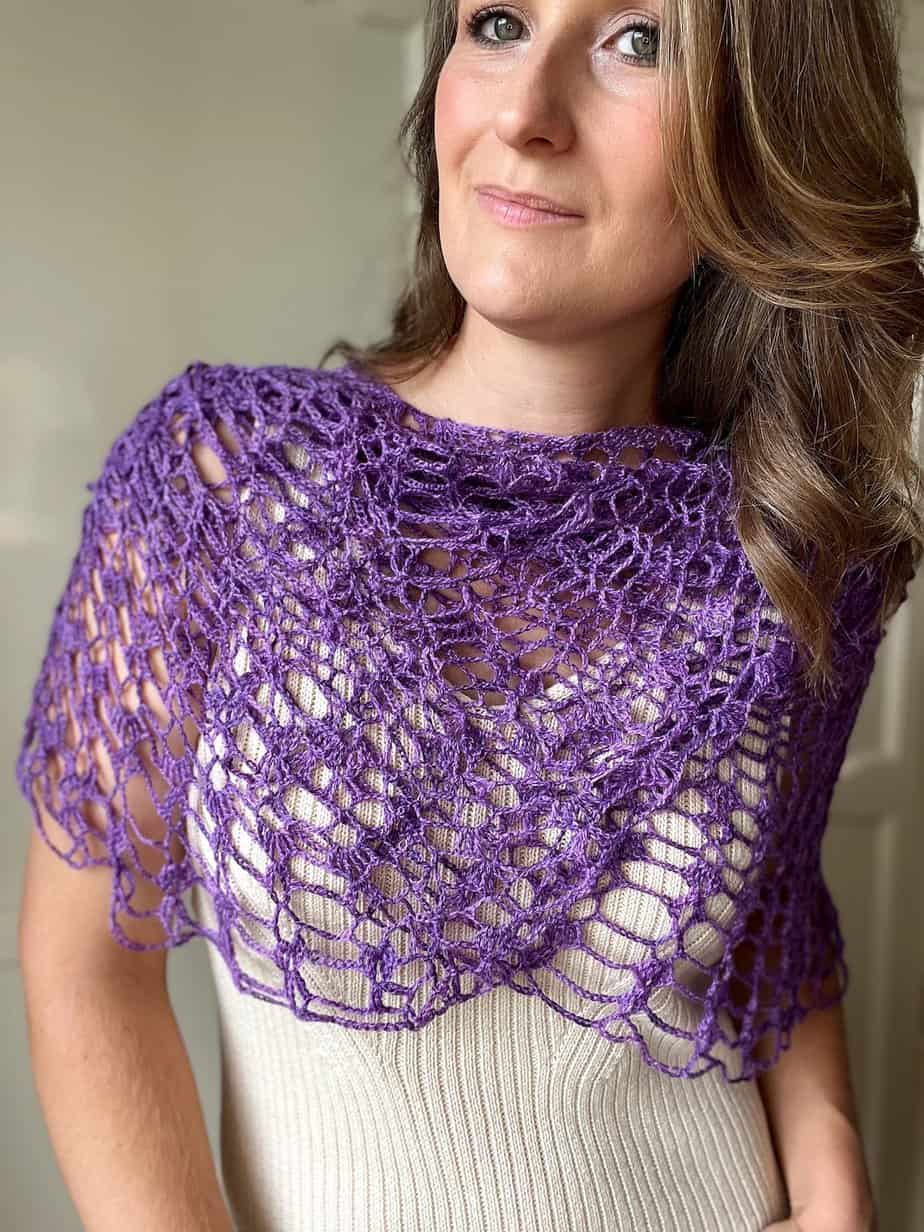
This delicate lace crochet cape pattern is quite literally three summer crochet garments in one. Made from 4 matching lace crochet panels, you can seam and tie them to create a shawl, cape or lace crochet poncho to wear.
However you style it you’re sure to add a touch of elegance to any outfit making it perfect for weddings, date nights and more.
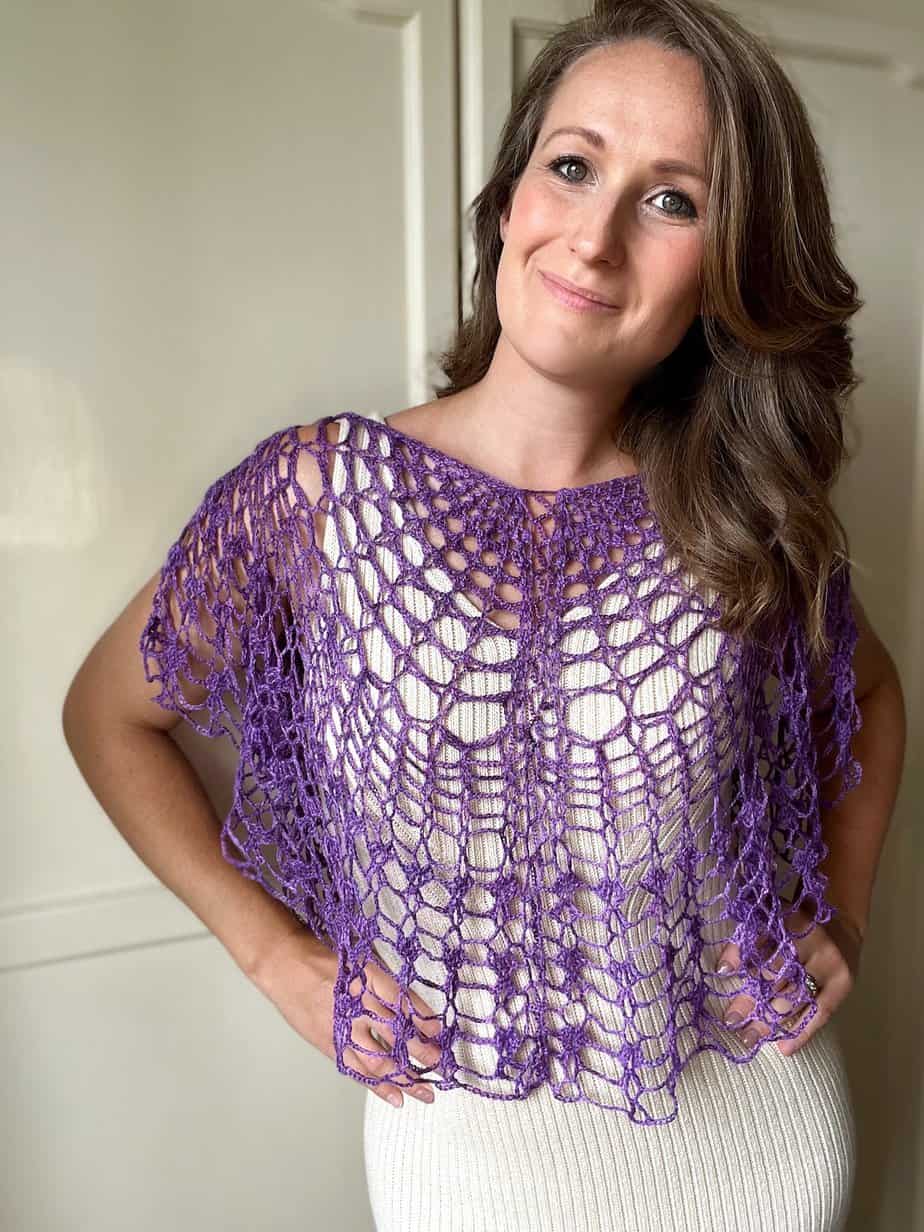
Table of Contents
Scroll down for the free crochet cape pattern, or purchase an ad-free, printable PDF version here:
This post may contain affiliate links. Please see my full disclosure and privacy policy for details.
About this Lace Crochet Cape Pattern
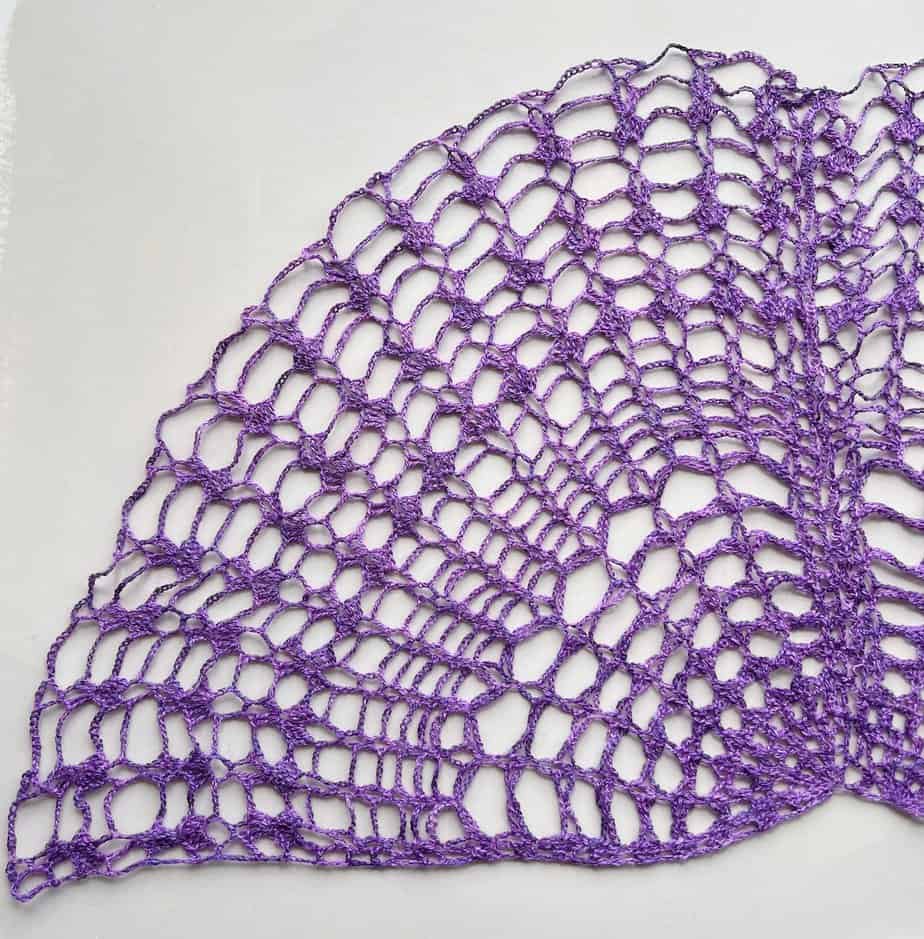
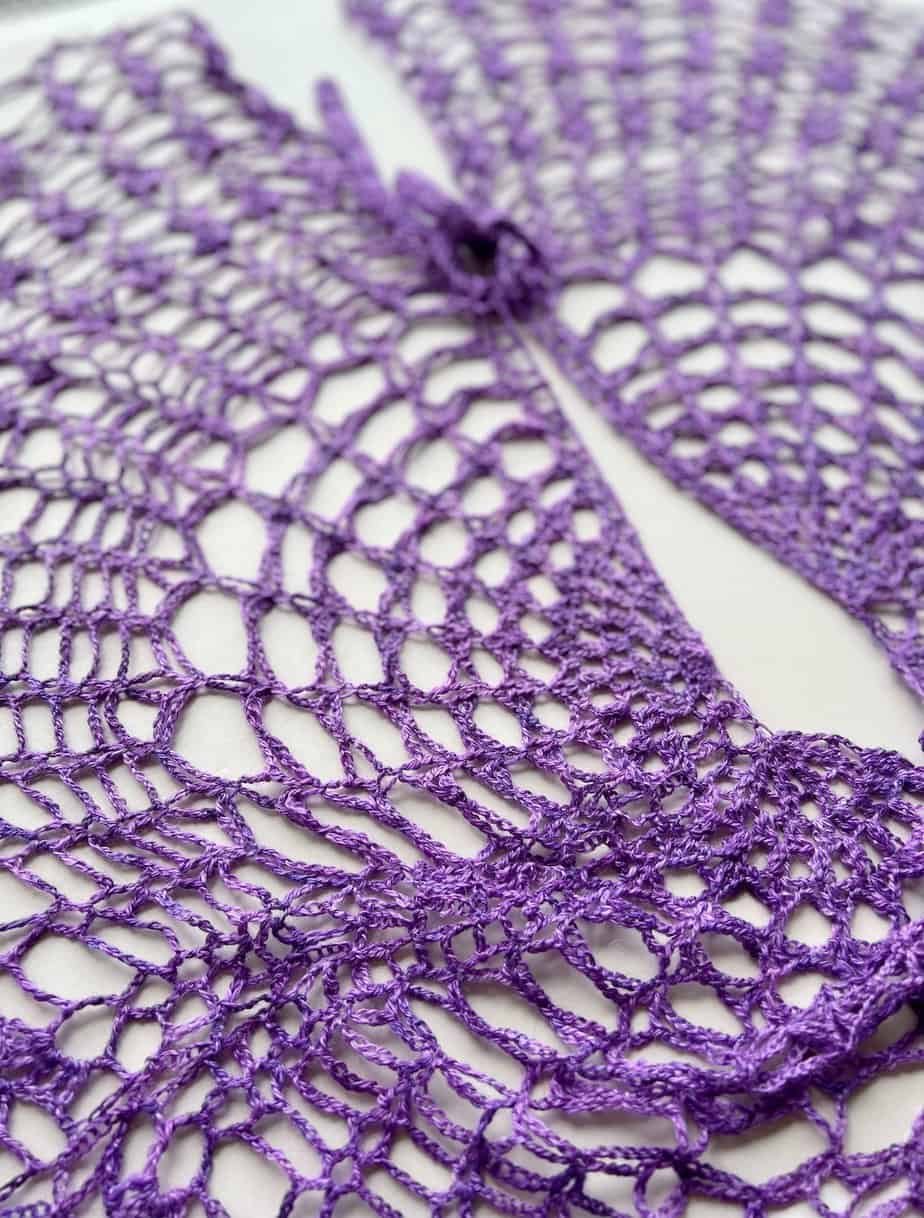
Using just three beginner crochet stitches, the lace on the cape is formed from repetitive chain spaces and stitches that grow with each row to form the quarter circle shape. These quarter circles are then easily joined to create the lace crochet top that you’d like it to be!
I designed this with beginners in mind as I thought that crocheting smaller pieces of lace might be more manageable than tackling a whole semi circle to start with. Plus it then means that you can join them and wear it as a cape, shawl or poncho – whichever you prefer.
Here’s what each Panel looks like:
What is crochet lace?
When designing the lace cape I realised I wasn’t quite sure exactly what crochet lace is so I looked it up so that I could share it with you. Turns out the definition is quite simple.
Crochet lace is a crochet stitch pattern that uses chains along with stitches (often US double crochet and treble stitches) to create openwork crochet designs.
There are lots of types of crochet lace including:
- hairpin lace
- broomstick lace
- filet lace
- Bruges lace
- Irish crochet lace
- pineapple stitch lace
They are all worked slightly differently but ultimately all create that open stitch work that crochet lace is famous for.
The main thing I think people worry about is that you need to be an advanced crocheter to make crochet lace. I’m here to tell you that you don’t! This design uses just beginner stitches and so although it may look tricky I know that you can achieve it.
How to wear the crochet lace cape
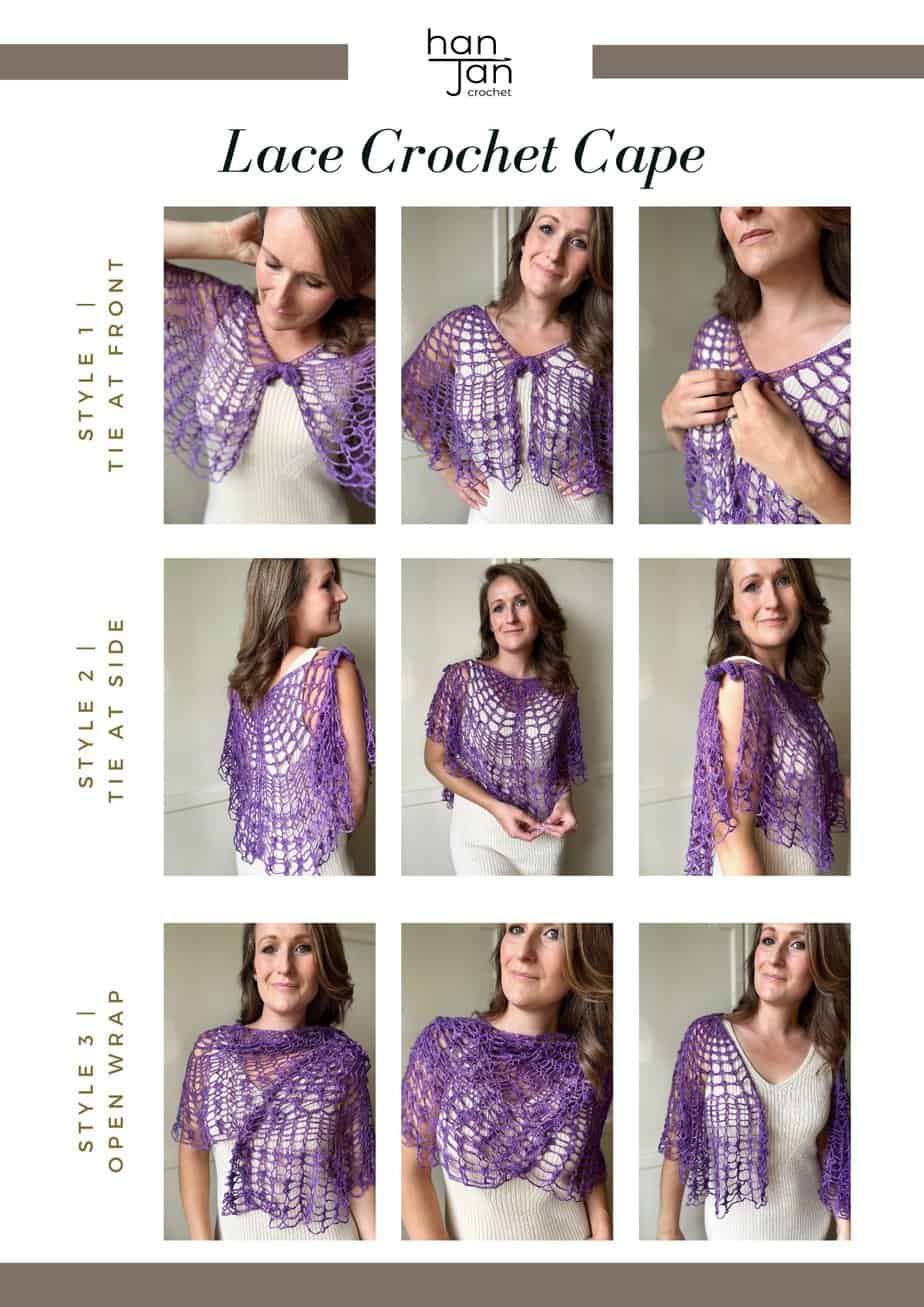
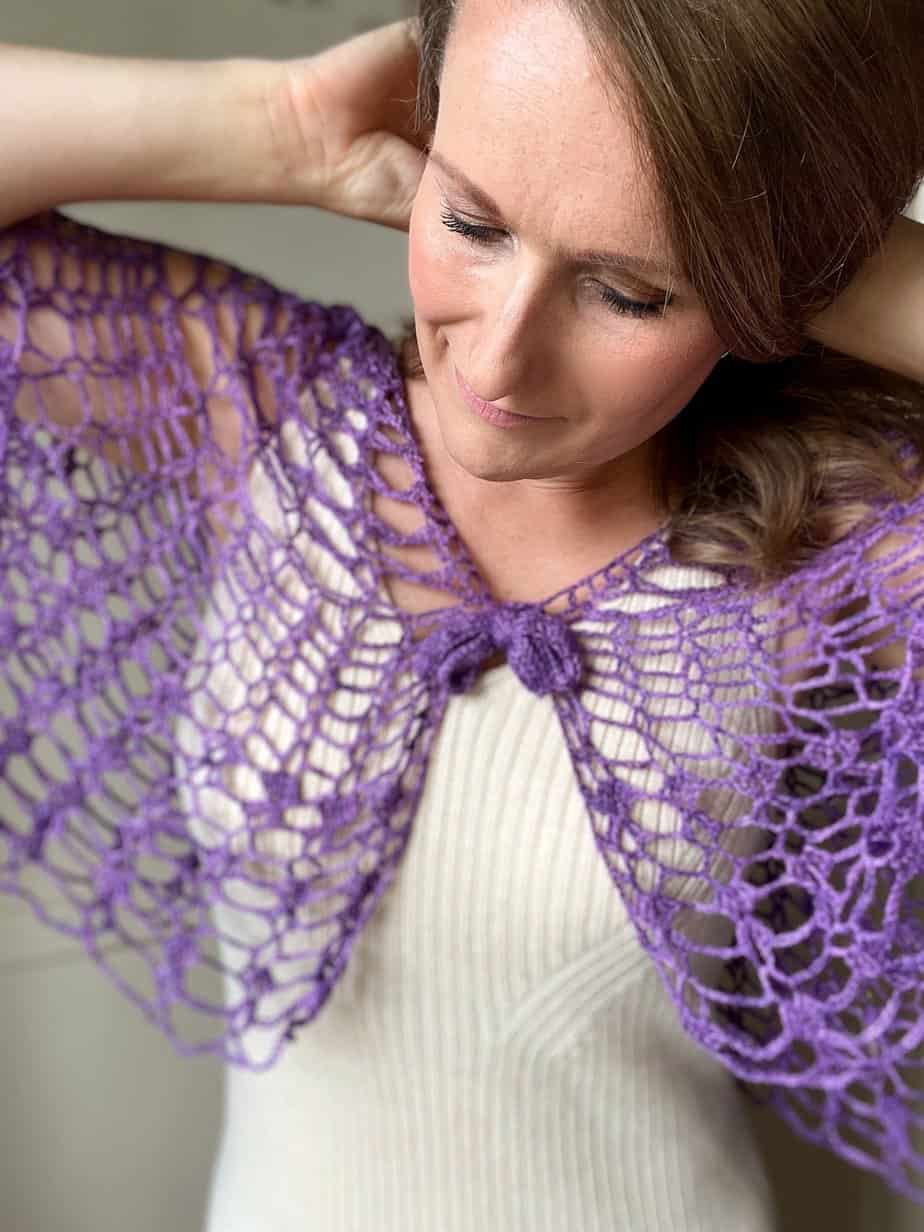
The most exciting part of the design to me is that you can wear it so many ways! It’s such a versatile crochet project that completely transforms itself and the outfit you wear it with. Let me show you some options:
Tie front crochet lace capelet
Style 1 is more formal perhaps and would be great for a wedding cape I think. After seaming the cape panels, you can tie them at the front and back to form a traditionally tied capelet (just a word for a shorter cape).
Semi circle lace summer top
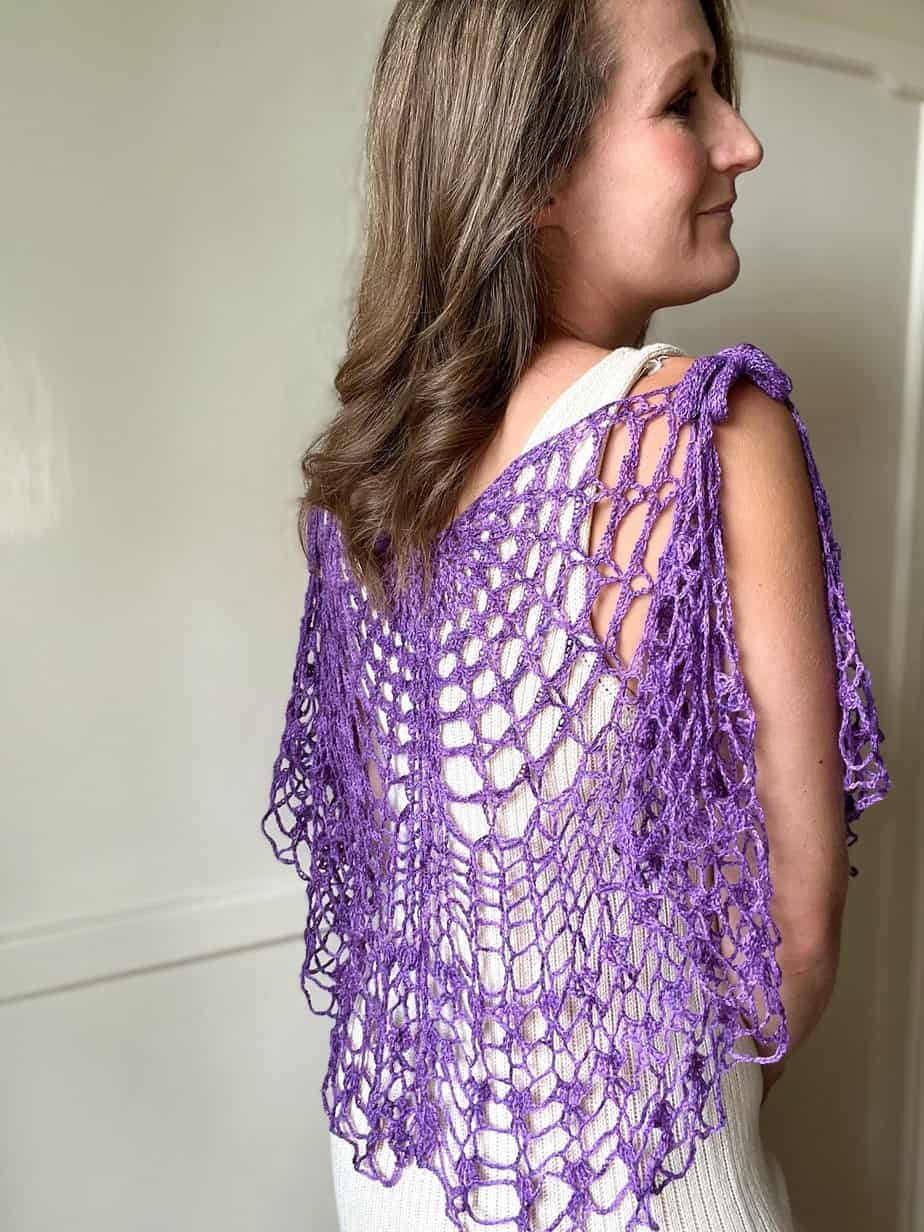
Style 2 is my favourite I think. Equally easy to throw on over a dress or jeans, this completely transforms your outfit and lifts it to the next level. Simply rotate the cape so that the ties are sitting on your shoulders and you’re done. This makes the top longer with the full semi circle sitting at both the front and back.
Simple lace shawl
Style 3 is perfect if capes aren’t your thing – throw it on as a shawl! You can just remove one tie and style it as an open shawl or tuck the ends in as I have to create more of a lace cowl look.
However you choose to wear it you can be confident of one thing, it will look amazing! Part of this is thanks to the beautiful yarn and the drape that it creates. The cape hangs so beautifully in every direction.
If you’re a lover of drape and want to try out something in straight construction then you might love my summer crochet cardigan pattern too!
Yarn
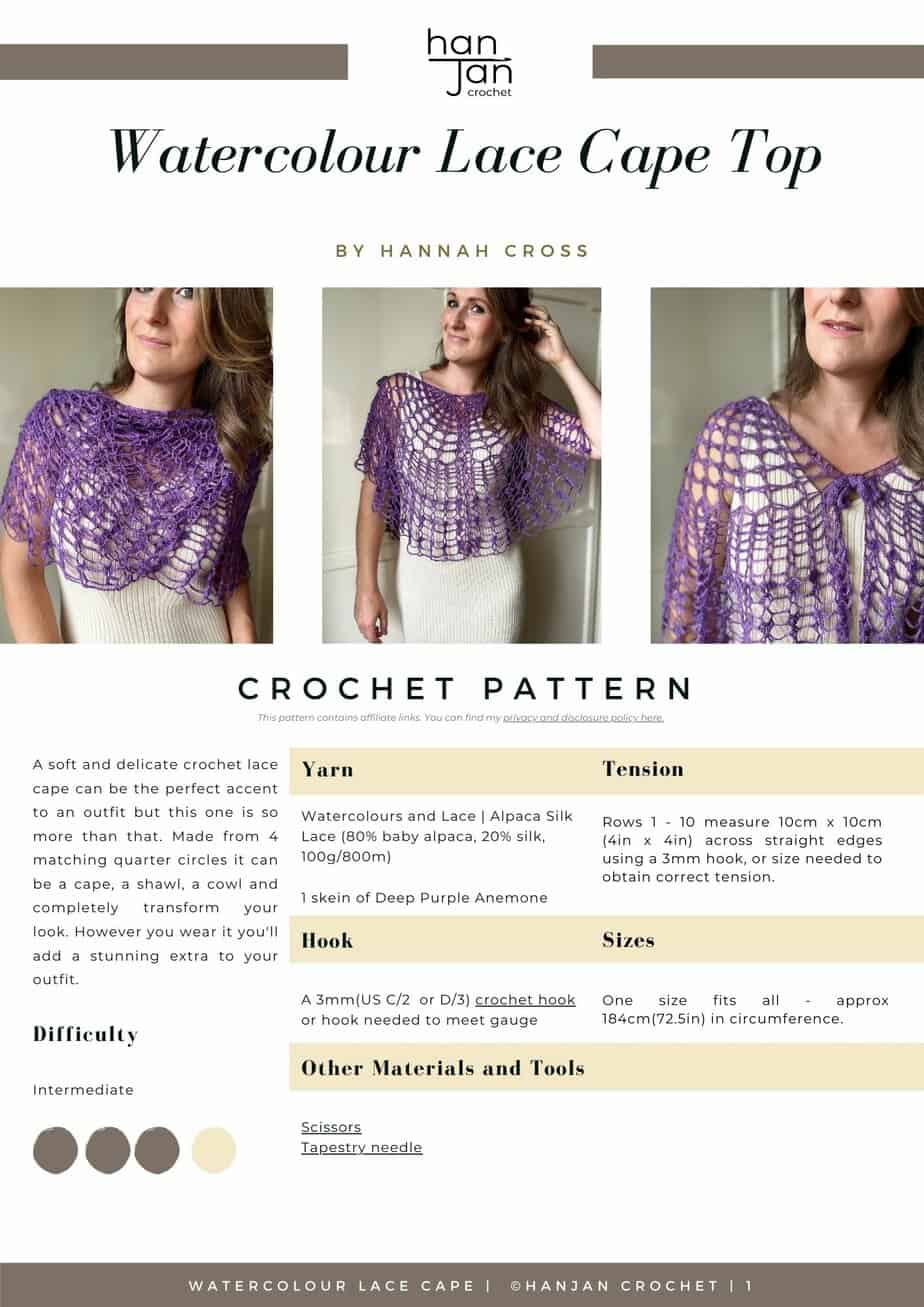
To make the crochet cape I used Watercolours and Lace | Alpaca Silk Lace (80% baby alpaca, 20% silk, 100g/800m).
1 skein of Deep Purple Anemone.
I often get asked about ideas for alternative yarns. Here are some that I think would work really well for this lace crochet pattern in various price ranges:
- Luminance Lace by WeCrochet, 100% Mulberry Silk, 439yds/50g
- Malabrigo Silkpaca, 70% Baby Alpaca, 30% Silk, 384m, 420yds/50g
- WYS Exquisite, 80% Merino Wool, 20% Silk, 800m, 875yds/100g
If you’re new to working with lace weight yarn then I’d love to share with you my tips for how to crochet with thin yarn. It might seem intimidating at first but I promise it’s worth it once you get the hang of it.
Tension and Sizing
The lace cape is one size fits all – approx 184cm (72.5in) in circumference.
You can easily add both width and depth to it though by continuing with the set pattern after the last row or making your ties or seam chains longer.
Rows 1 – 10 measure 10cm x 10cm (4in x 4in) across straight edges using a 3mm hook, or size needed to obtain correct tension.
Materials
Along with your yarn, you will need the following:
- A 3mm(US C/2 or D/3) crochet hook- my favourites are Furls Streamline Swirl crochet hooks or Clover Amour crochet hooks.
- Scissors
- Tapestry Needle
Pattern Options
Get this lace crochet cape pattern free in this blog post in US terms – just scroll down to find it! You can also purchase an ad-free, printable PDF in both UK an US terms with added extras in my pattern stores:
Purchase and Print
Get the ad-free, printable PDF with added extras in my pattern stores:
Don’t forget to join HanJan Crochet to receive regular discount codes (and more free patterns!) and Pin this delicate crochet lace top pattern to your crochet Pinterest board!

Glossary and Abbreviations
ch(s) – chain(s)
sp – space
ss – slip stitch
RS – right side
WS – wrong side
sk – skip
rep – repeat
yoh – yarn over hook
Crochet Stitches
| UK Crochet Terminology | US Crochet Terminology |
| dc – double crochet | sc – single crochet |
| tr – treble crochet | dc – double crochet |
| dtr- double treble crochet | tr – treble crochet |
Special Stitches
3 double crochet cluster stitch / US 3dc-cl
Yarn over, insert hook into st, yarn over and pull through, yarn over and pull through 2 loops] 3 times into same st or space, yarn over, pull through all loops on hook.
Tks (Tunisian knit stitch)
Loop on hook counts as first st, *insert hook through fabric from RS to WS going between the vertical strands on next st, yoh and pull through to RS, leave loop on hook; rep from * to end.
RetP (return pass)
Yoh and pull through one loop, (yoh and pull through 2 loops) rep across until 1 loop remains on hook.
The Tunisian stitches are used for the little ties but if you prefer you can use regular slip stitches or single crochet. If you’ve never tried Tunisian crochet before though this is a great place to start as you can do it on a regular crochet hook!
Watercolour Lace Cape Pattern Notes
The cape is made up of 4 identical Panels.
Each Panel is worked in rows throughout.
Turn your work after each row.
Panels are then joined together to make 2 pieces (semi circles).
One piece can be worn as a Shawl or the 2 pieces can be fastened together with a tie to be worn as a Cape.
When working the final st of a row, you will need to work the st into the third ch of the turning chain of the previous row.
Watercolour Lace Crochet Cape Pattern
US Crochet Terminology
To unlock Exclusive Content on the HanJan Crochet Blog, all you need to do is click the box below and the Grow.me app will pop up, allowing you to enter your email and create a password.
Once you’ve created an account, every time you see Exclusive Content on my blog (or any others that use Grow), simply login to your Grow account. Be sure to switch to the login screen to enter your login credentials.
If you forget your password, click the “forgot password” link and follow the prompts. Please note that I’m unable to assist with resetting Grow passwords or accessing your Grow account, so be sure to save your login information in a safe place.
Thank you for subscribing and for joining me at HanJan Crochet! I hope you enjoy the exclusive content available on the site and I can’t wait to see what you create 🙂
Row 29: ch6, skip ch-2 sp, skip 3tr, *(2tr, ch3, 2tr) in next ch-1 sp, ch5, skip (3tr, ch-4 sp, 3tr); rep from * across to final ch-2 sp, ch2, skip ch-2 sp, tr in final st, turn. [66sts, 33 ch-sps]
Row 30: ch6, skip ch-2 sp, skip 2tr, *(tr, ch5, tr) in next ch-3 sp, ch6, skip (2tr, ch-5 sp, 2tr); rep from * across to final ch-2 sp, ch2, skip ch-2 sp, tr in final st, turn. [34sts, 33 ch-sps]
Row 31: ch6, skip ch-2 sp, skip tr, *(3tr, ch1, 3tr) in next ch-5 sp, ch7, skip (tr, ch-6 sp, tr); rep from * across to final ch-2 sp, ch2, skip ch-2 sp, tr in final st, turn. [98sts, 33 ch-sps]
Row 32: ch6, skip ch-2 sp, skip 3tr, *(2tr, ch3, 2tr) in next ch-1 sp, ch8, skip (3tr, ch-7 sp, 3tr); rep from * across to final ch-2 sp, ch2, skip ch-2 sp, tr in final st, turn. [66sts, 33 ch-sps]
Row 33: ch6, skip ch-2 sp, skip 2tr, *(tr, ch5, tr) in next ch-3 sp, ch9, skip (2tr, ch-8 sp, 2tr); rep from * across to final ch-2 sp, ch2, skip ch-2 sp, tr in final st, turn. [34sts, 33 ch-sps]
Fasten off.
TO MAKE UP
Block each Panel to measure approximately 46cm (18in) along straight edges.
With RS facing you, place 2 Panels next to each other with the straight edges lined up.
Join yarn in the corner on one Panel with a ss, ch4, ss in Row 1 on adjacent Panel, *ch6, ss in next row-end on first Panel, ch4, ss in adjacent row-end on second Panel; rep from * until all rows have been joined.
Fasten off.
Join the other 2 Panels in the same way.
CAPE TIES
Make 2
The Cape Ties are worked using Tunisian stitches.
You can use a regular crochet hook for this as it is worked in short rows.
Foundation chain: ch6
Row 1 (RS): insert hook in second ch from hook, yoh and pull up a loop, leave loop on hook, *insert hook in next ch, yoh and pull up loop, leave loop on hook; rep from * 3 times more (6 loops on hook), yoh and pull through one loop, (yoh and pull through 2 loops) 5 times. [6 Tss]
Row 2: Tks in each across, RetP across. [6 Tks]
Rep Row 2 until ties measures 48cm (19in).
With WS facing, ss the long edges together to form a tube.
Fasten off.
Turn so RS is facing you; you may need to use your crochet hook to pull one end through.
TO MAKE UP
Sew the open ends if the Ties closed. Secure the Ties to join the 2 pieces together and the front and back.

Join HanJan and Share Your Crochet!
It’s an honour to be able to create and share my free crochet patterns with you. I’d love to stay connected and send you regular discount codes and free patterns! Please sign up for my subscriber list to get a free gift right now!
I look forward to seeing your finished crochet projects, especially this easy crochet pattern, so please share them with me in the HanJan Crochet Facebook group or on Instagram and tag #hanjancrochet.
Purchase and Print
Get the ad-free, printable PDF with added extras in my pattern stores:

Don’t forget to share your projects on Ravelry!
More Crochet Patterns You Might Enjoy
If you enjoy making lightweight summer crochet garments here are a couple more patterns and tutorials you would enjoy crocheting!
