This post may contain affiliate links. Please see my full disclosure and privacy policy for details.
Pattern for: Beginner Granny Square Sweater Pattern
Yarn used: DK (category 3 weight)
Difficulty level: Easy
Perfect for: a quick and easy crochet to use up leftover yarn that creates a trendy granny pullover to wear anytime!
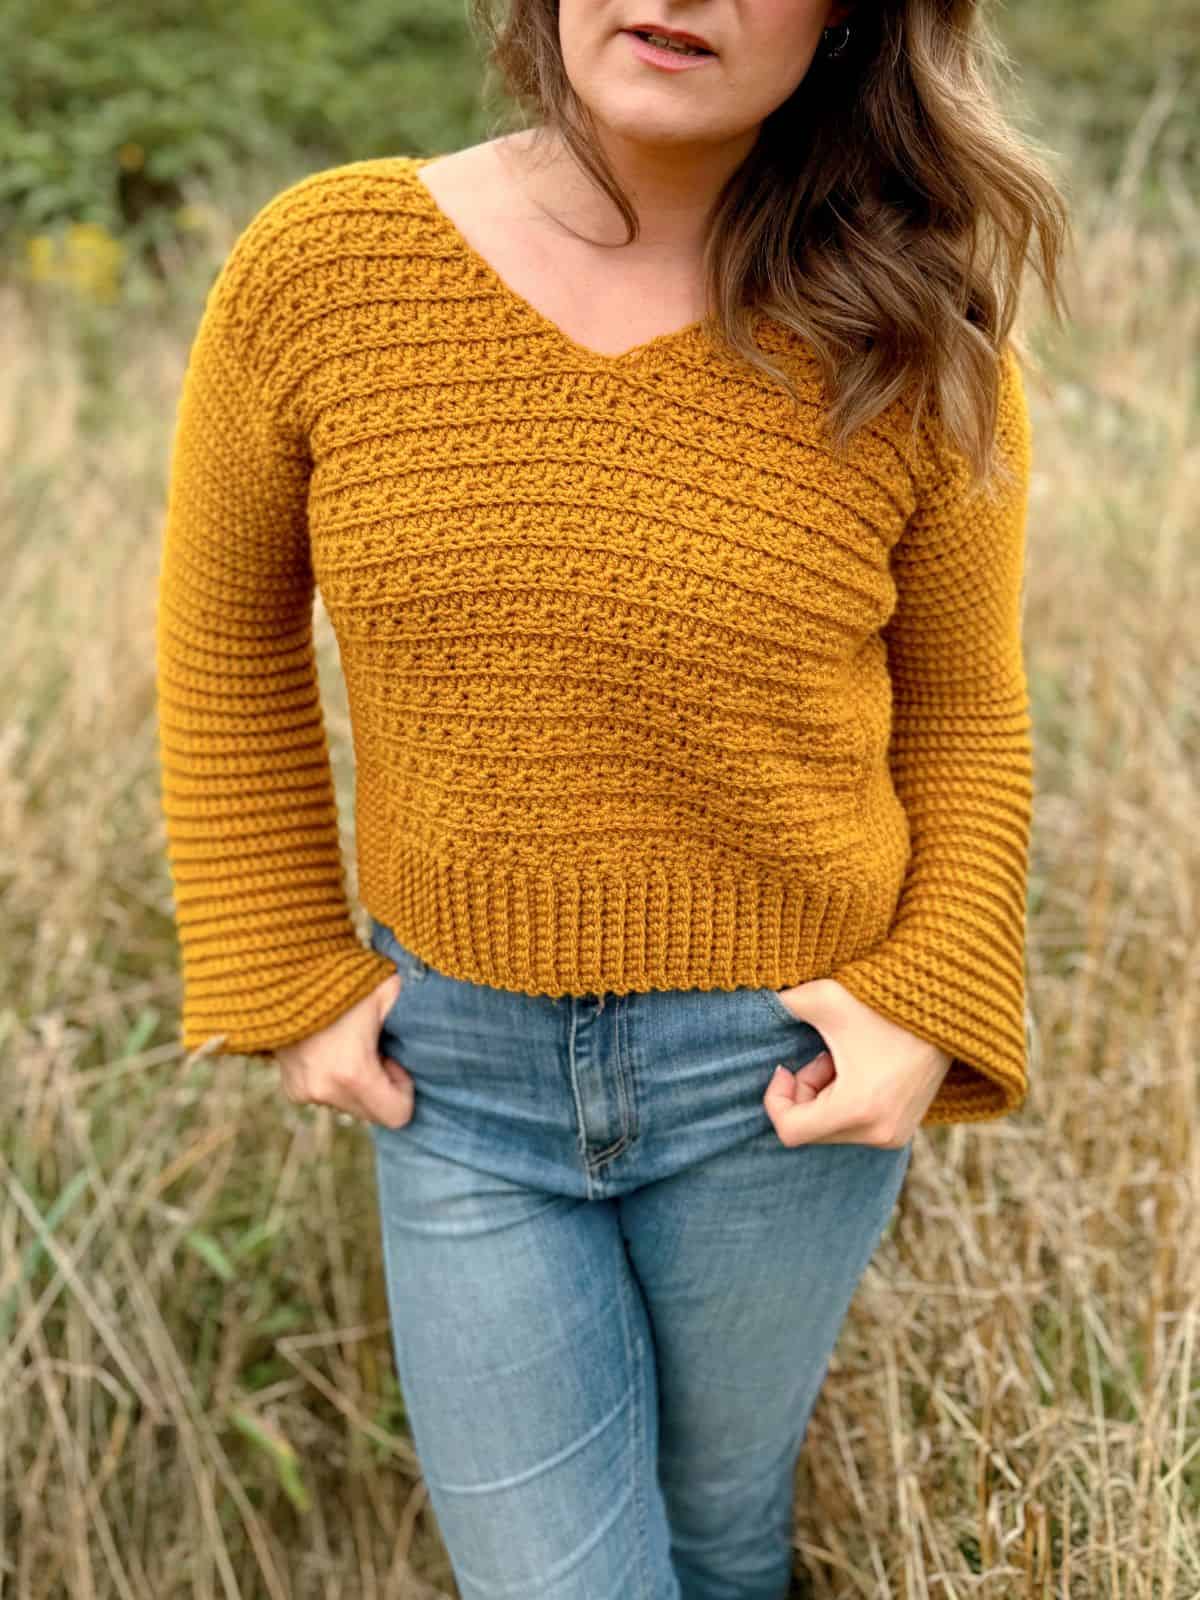
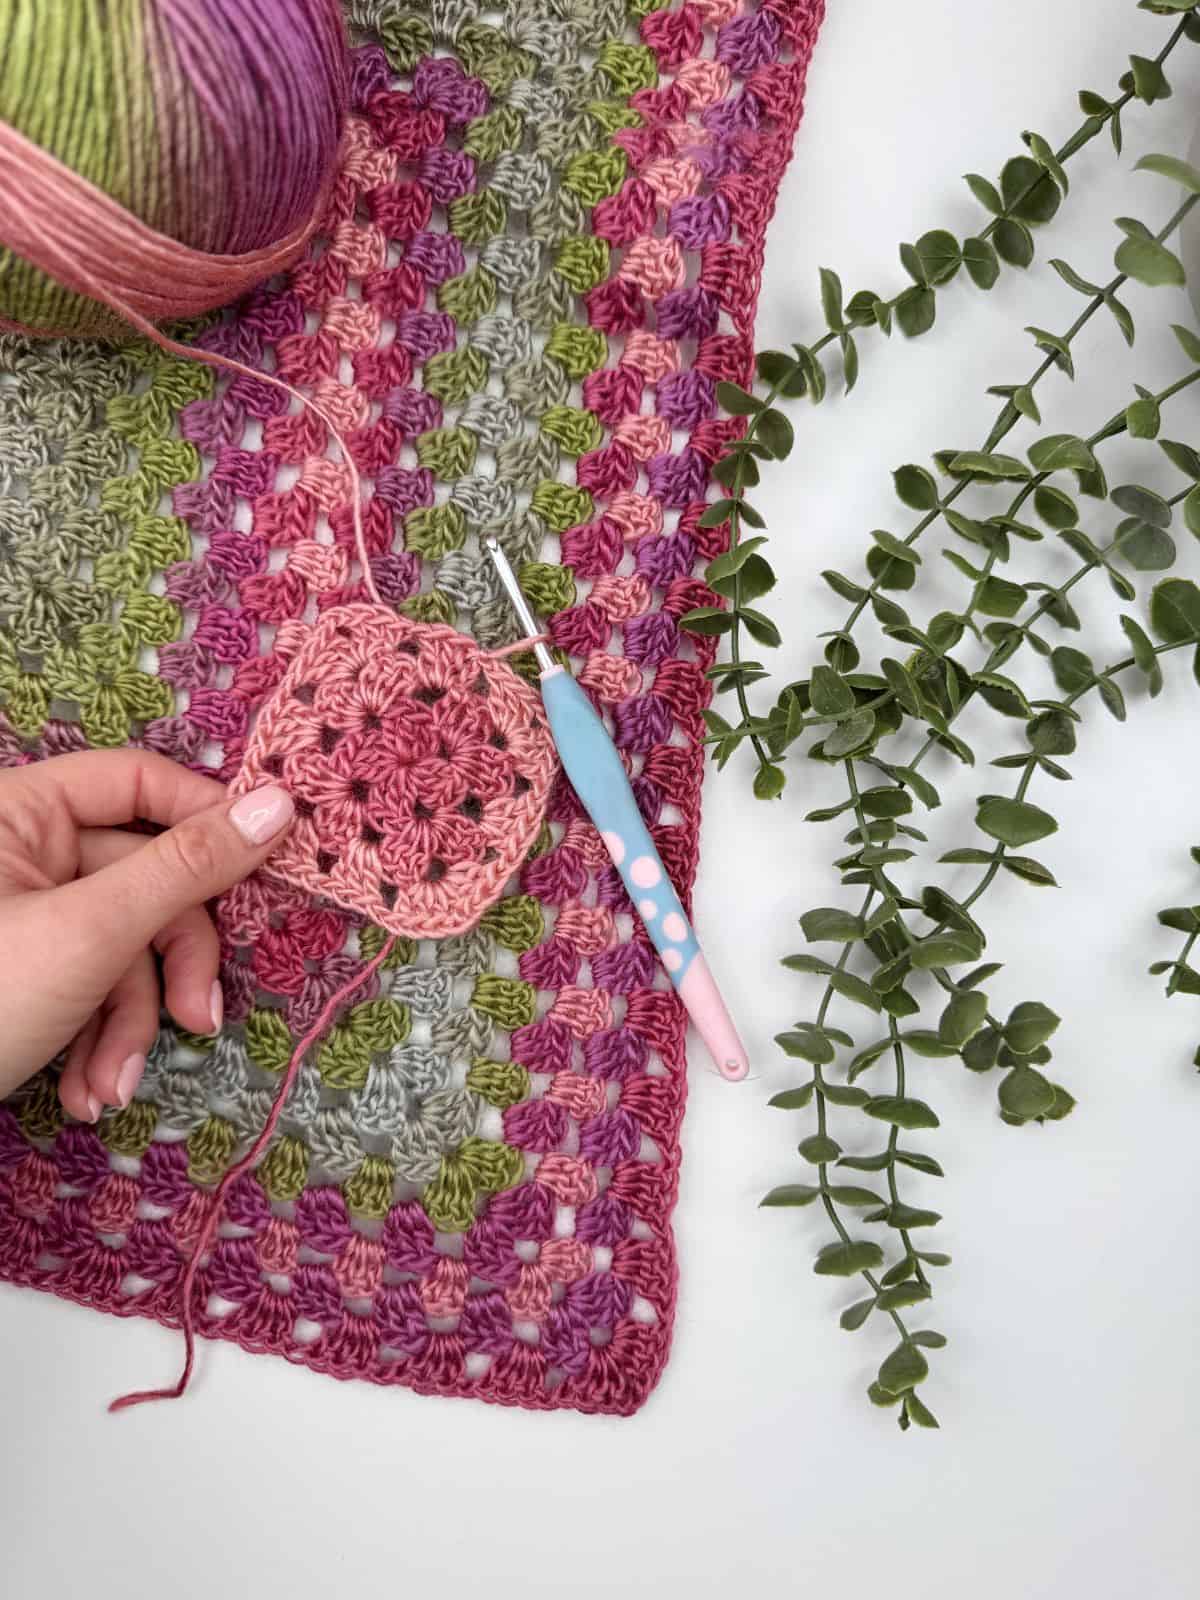
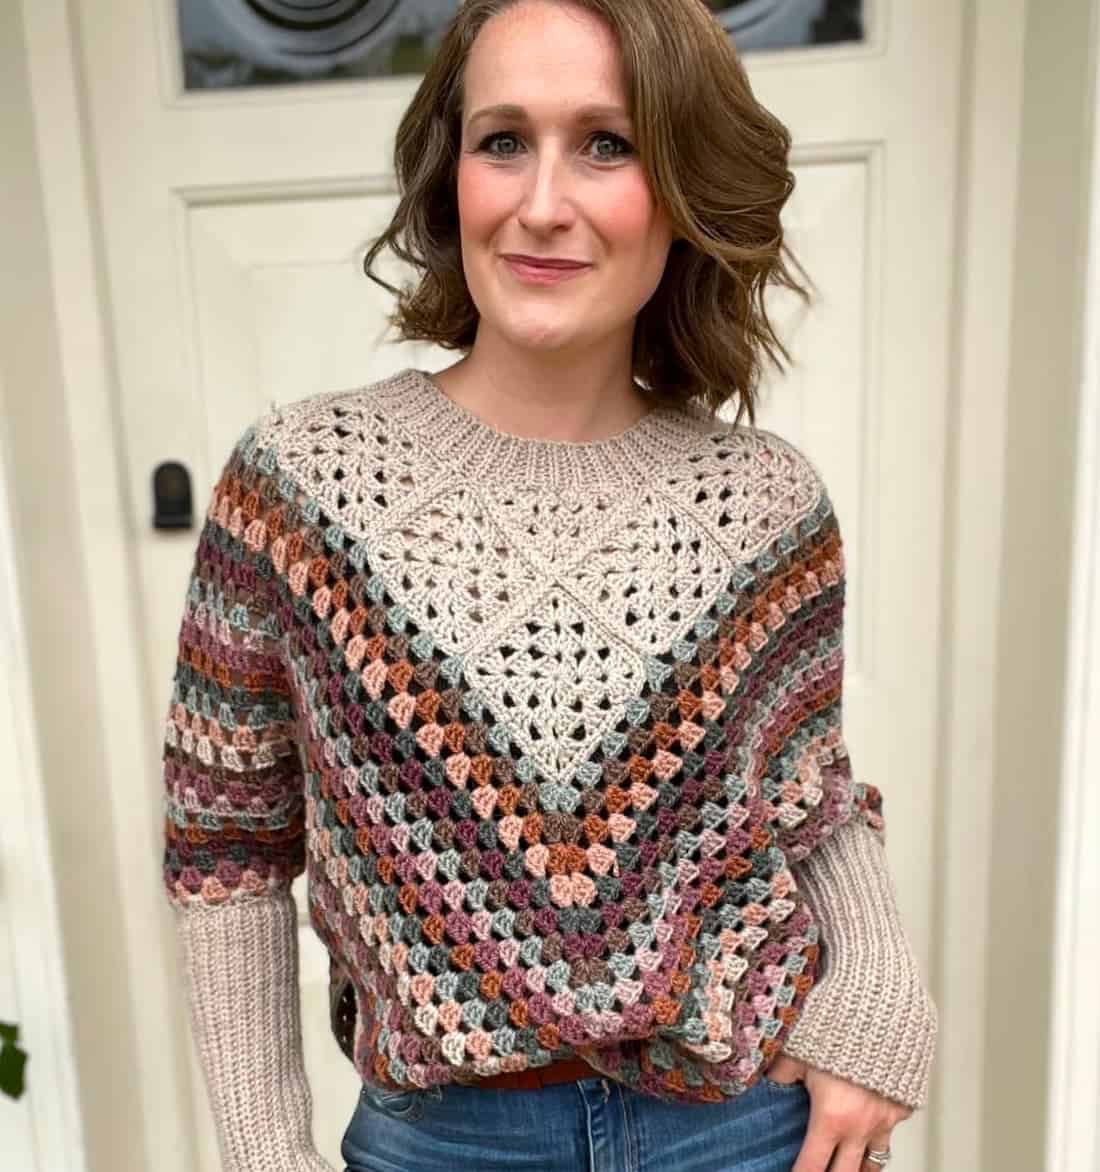
Hannah’s Notes: This granny square sweater pattern is easy to make and even easier to wear! Simply make four granny squares and seam them together to create a stunning crochet box sweater that you will wear every season.
Perfect for beginners, this granny square crochet jumper or top offers endless colour possibilities so you can make yours unique.
If you’re anything like I was, crochet garments might scare you just a little bit.
I mean, it’s so much easier to make a blanket or scarf because it doesn’t really matter if they don’t come out the right size surely?!
Whilst I still love designing crochet blanket patterns and accessory patterns, I have found a new passion for garments over the last few years. I am really excited to bring this updated version of the 4 granny square sweater to you.
I guarantee that if you can make a granny square then you can crochet this sweater – it literally is 4 granny squares joined together (which also makes it a really fast crochet project too!).
If you’ve not made a granny square before, let me show you how in my granny square crochet pattern tutorial. Once you’ve cracked the technique, pop back here and we can make the sweater together!
If you’d also like to learn more about granny square crochet, you might like my post about the history of the granny square. I find it fascinating!
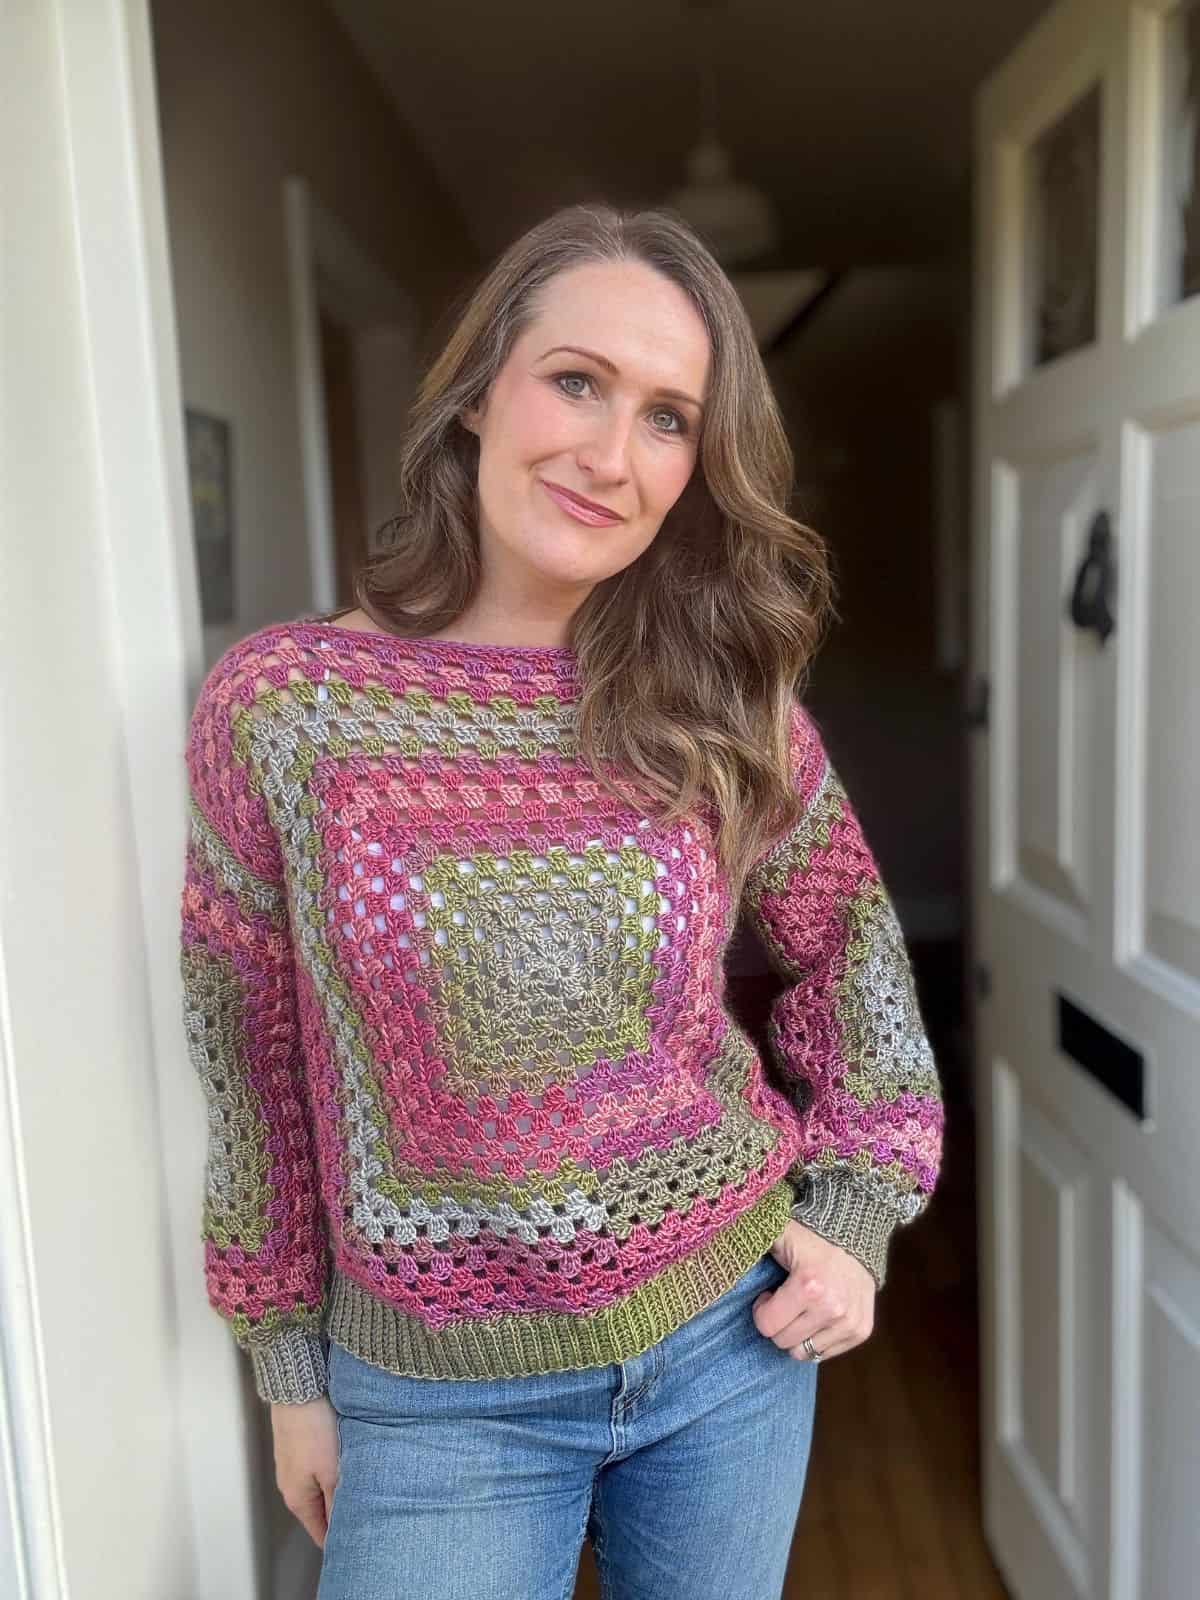
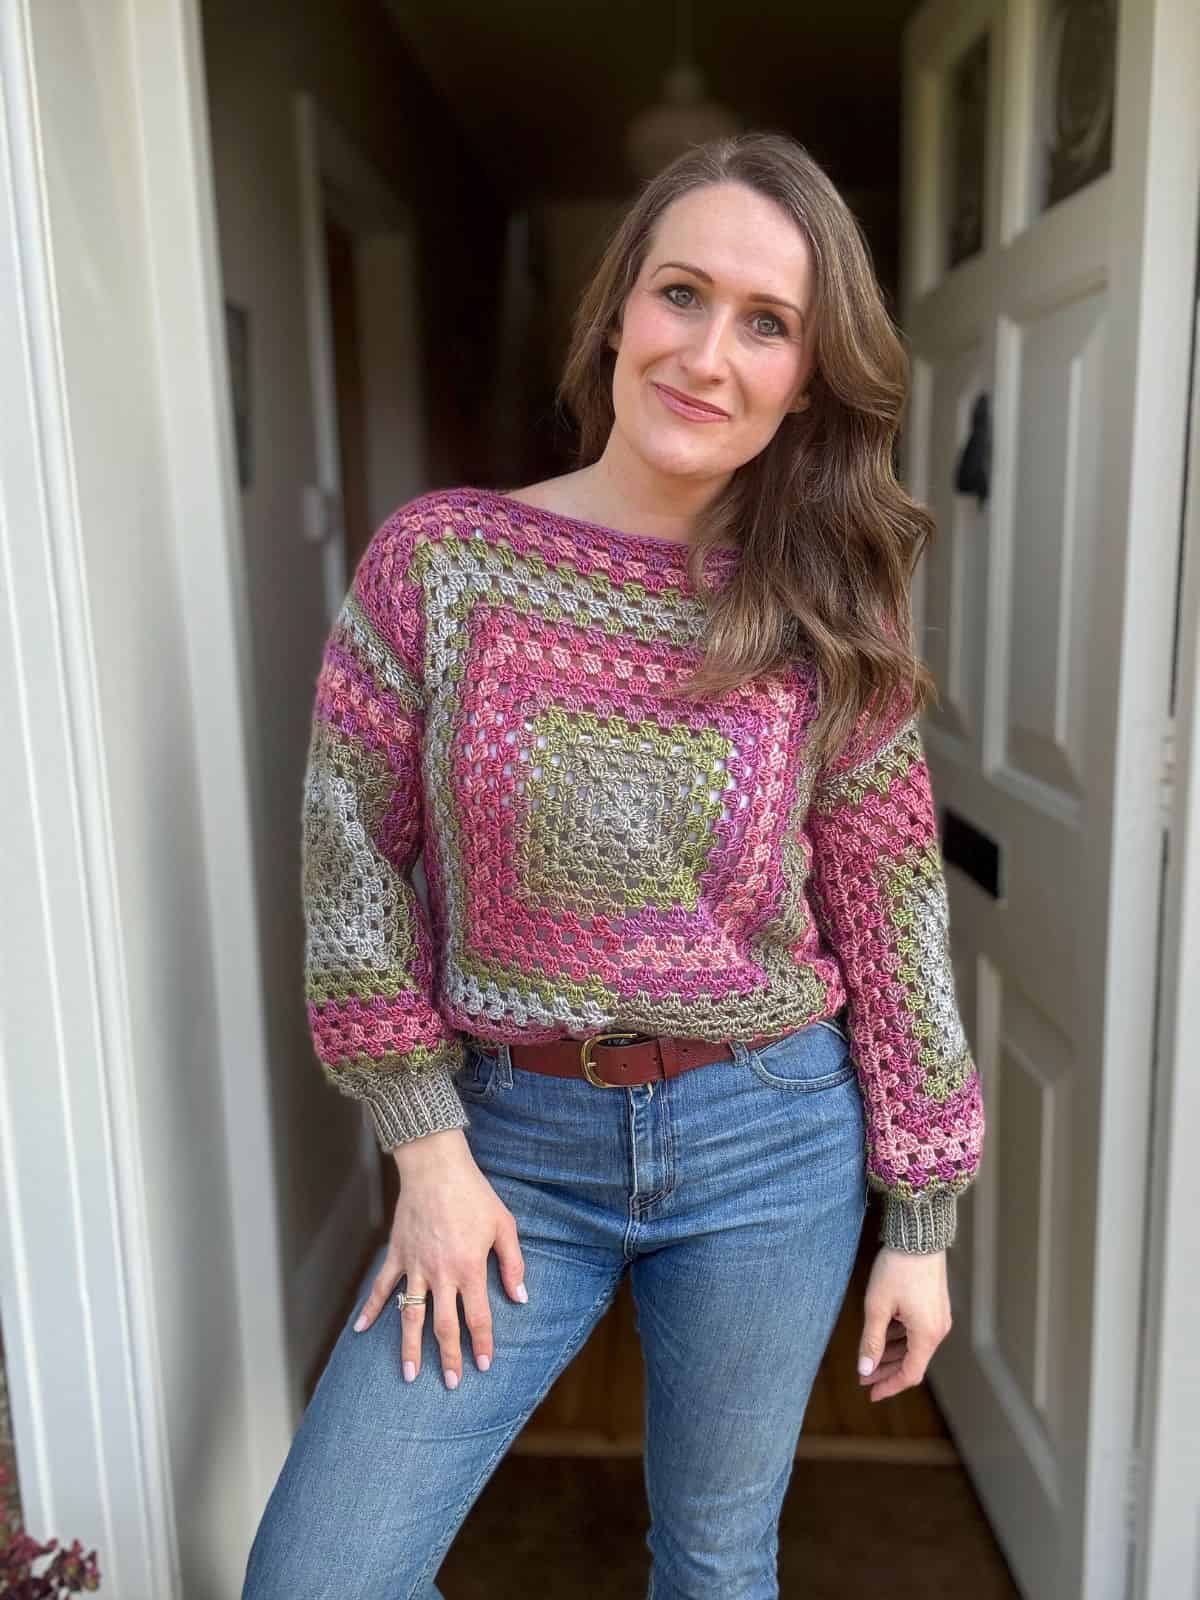
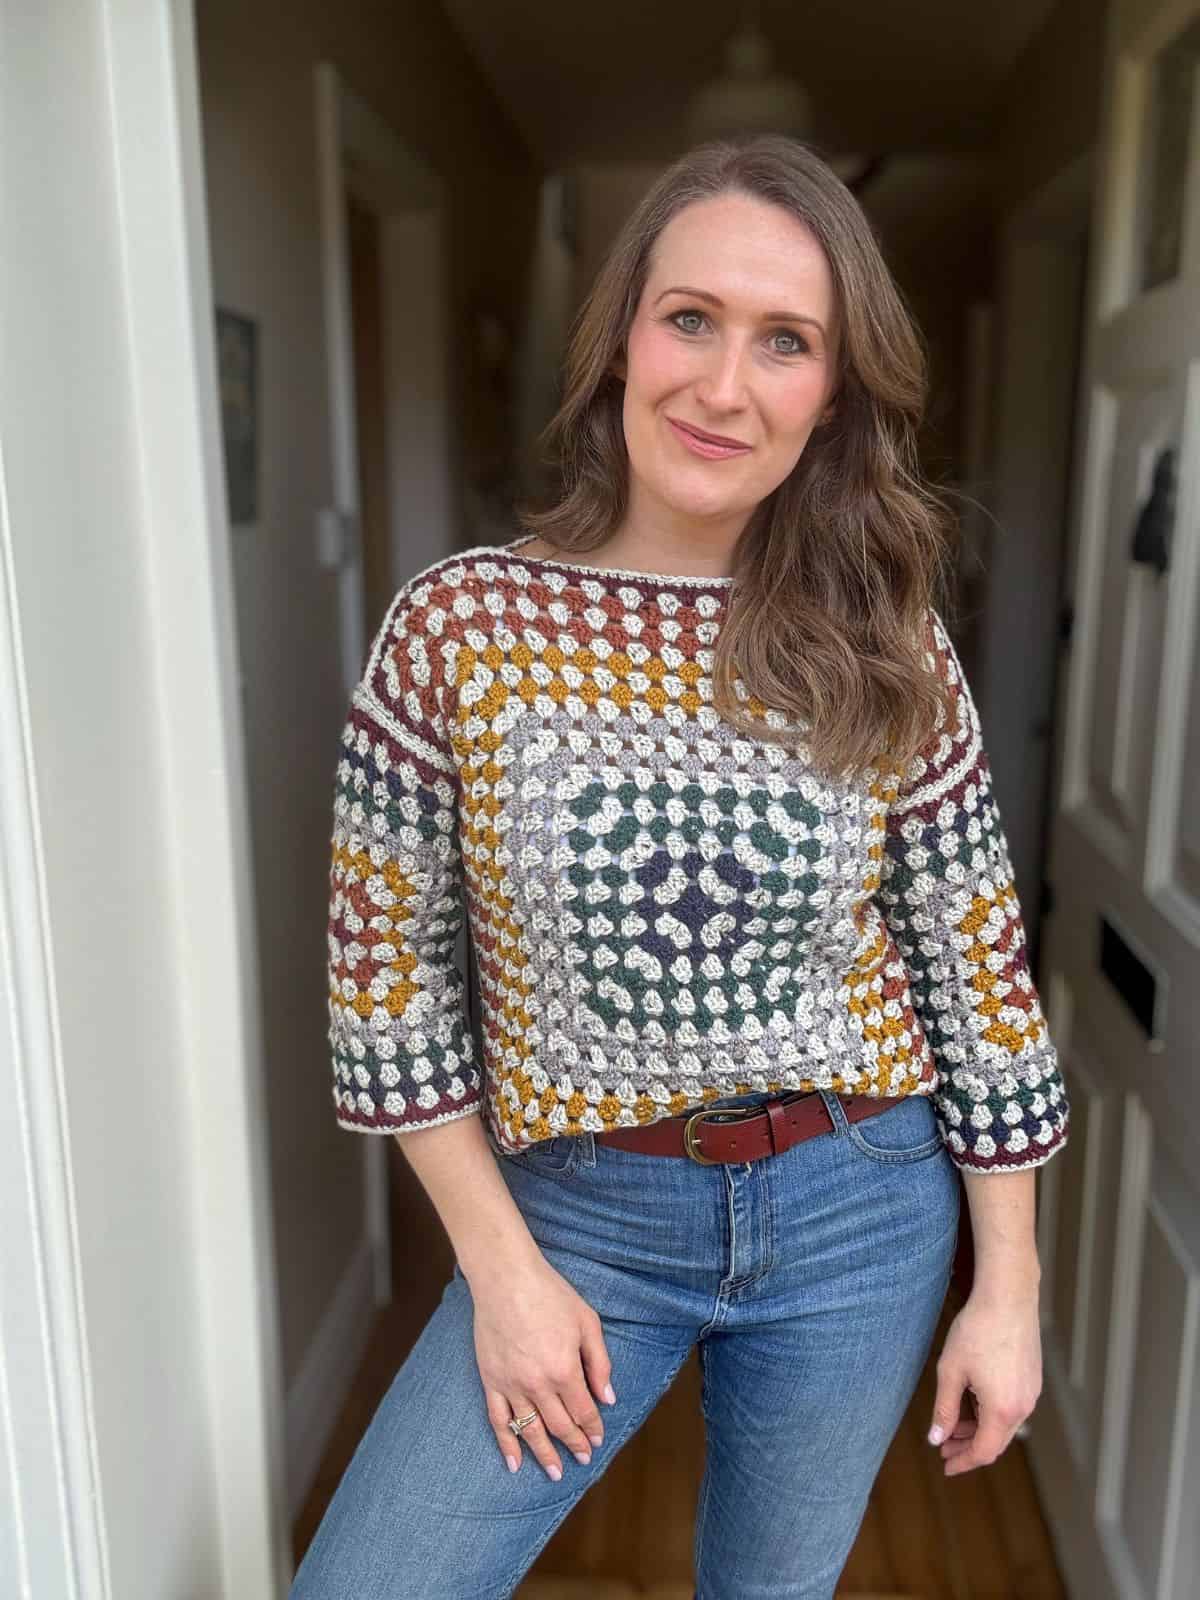
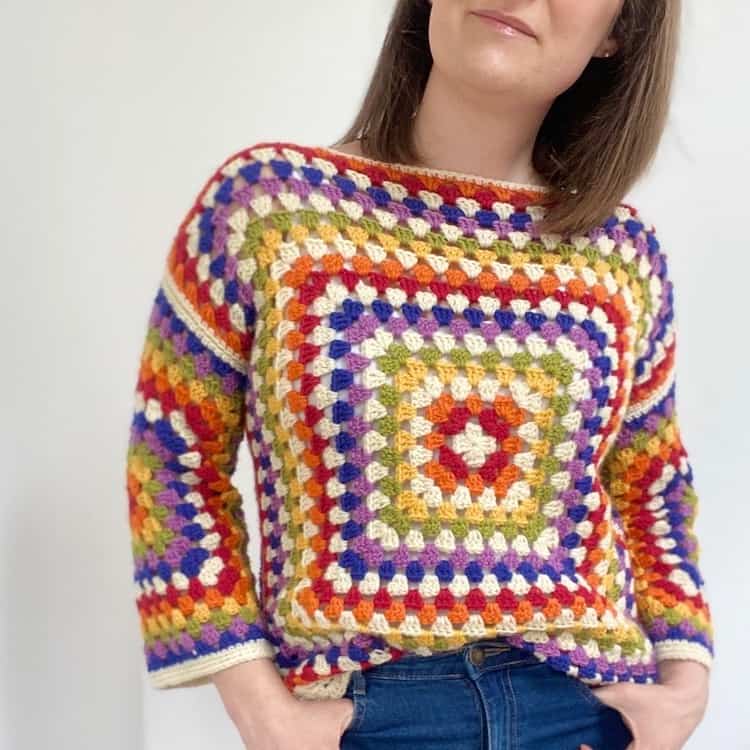
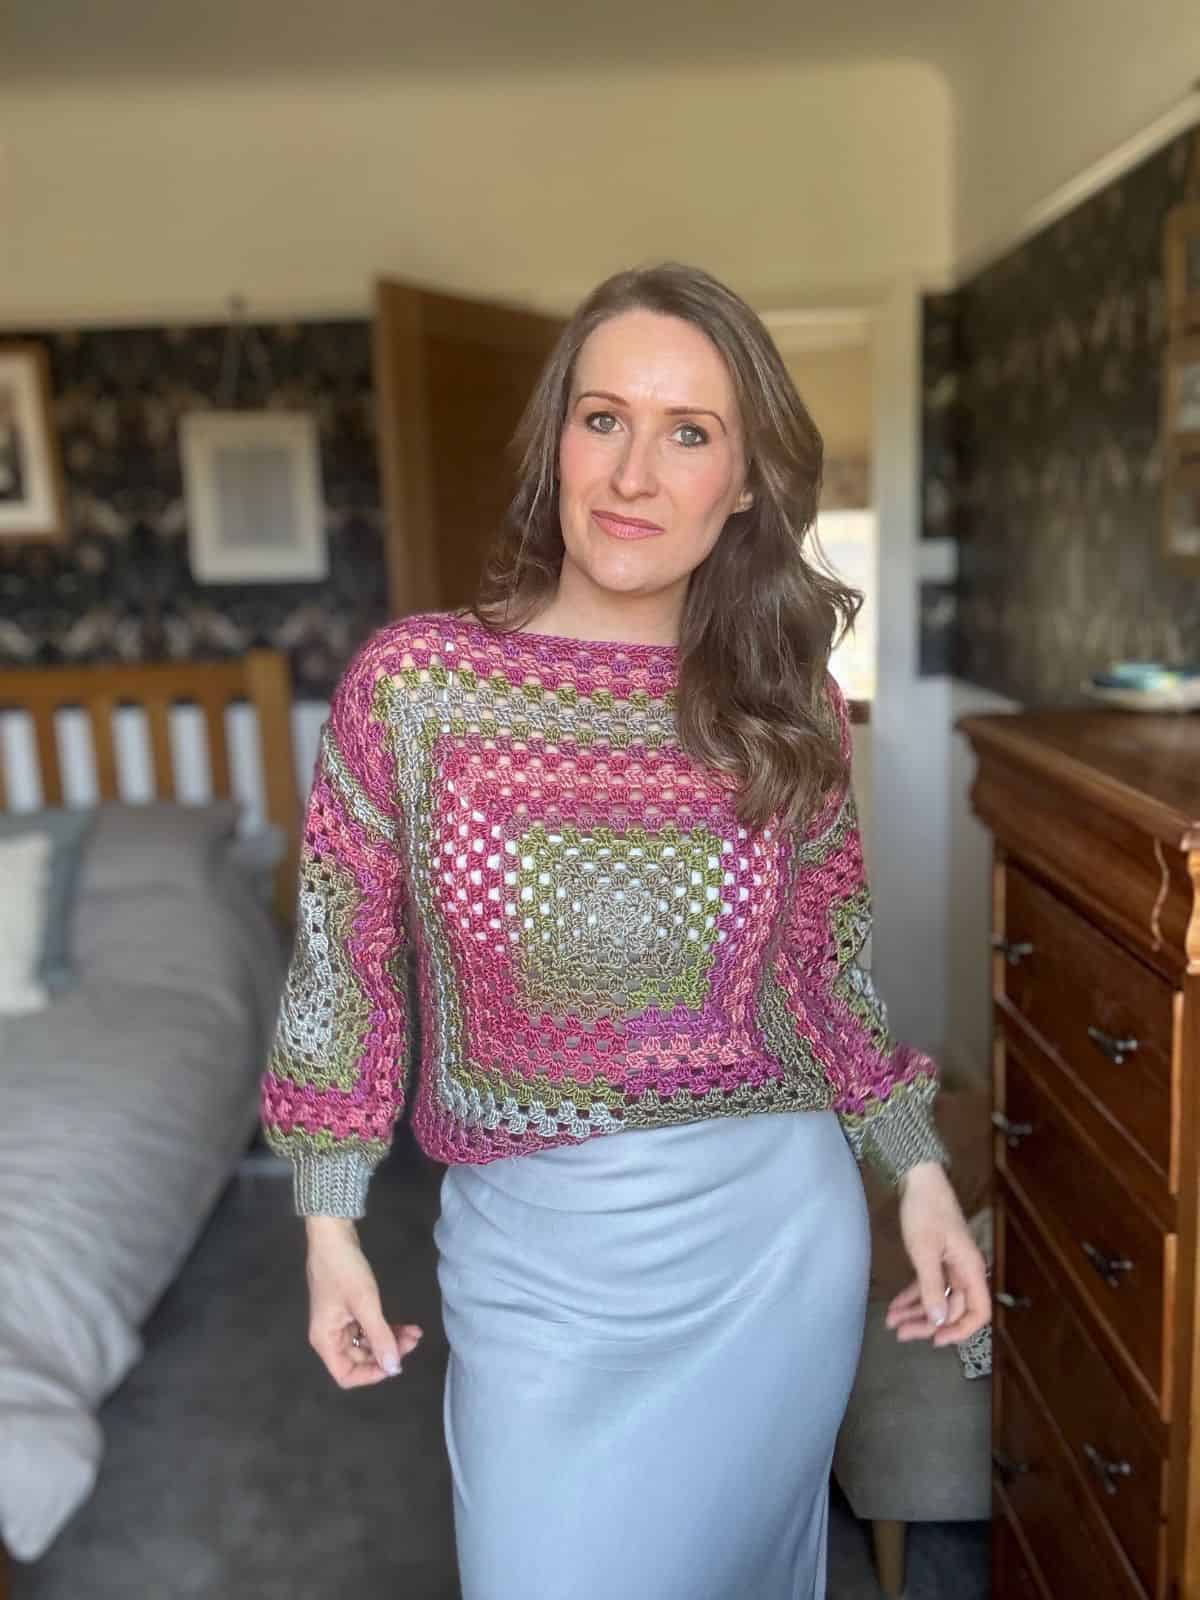
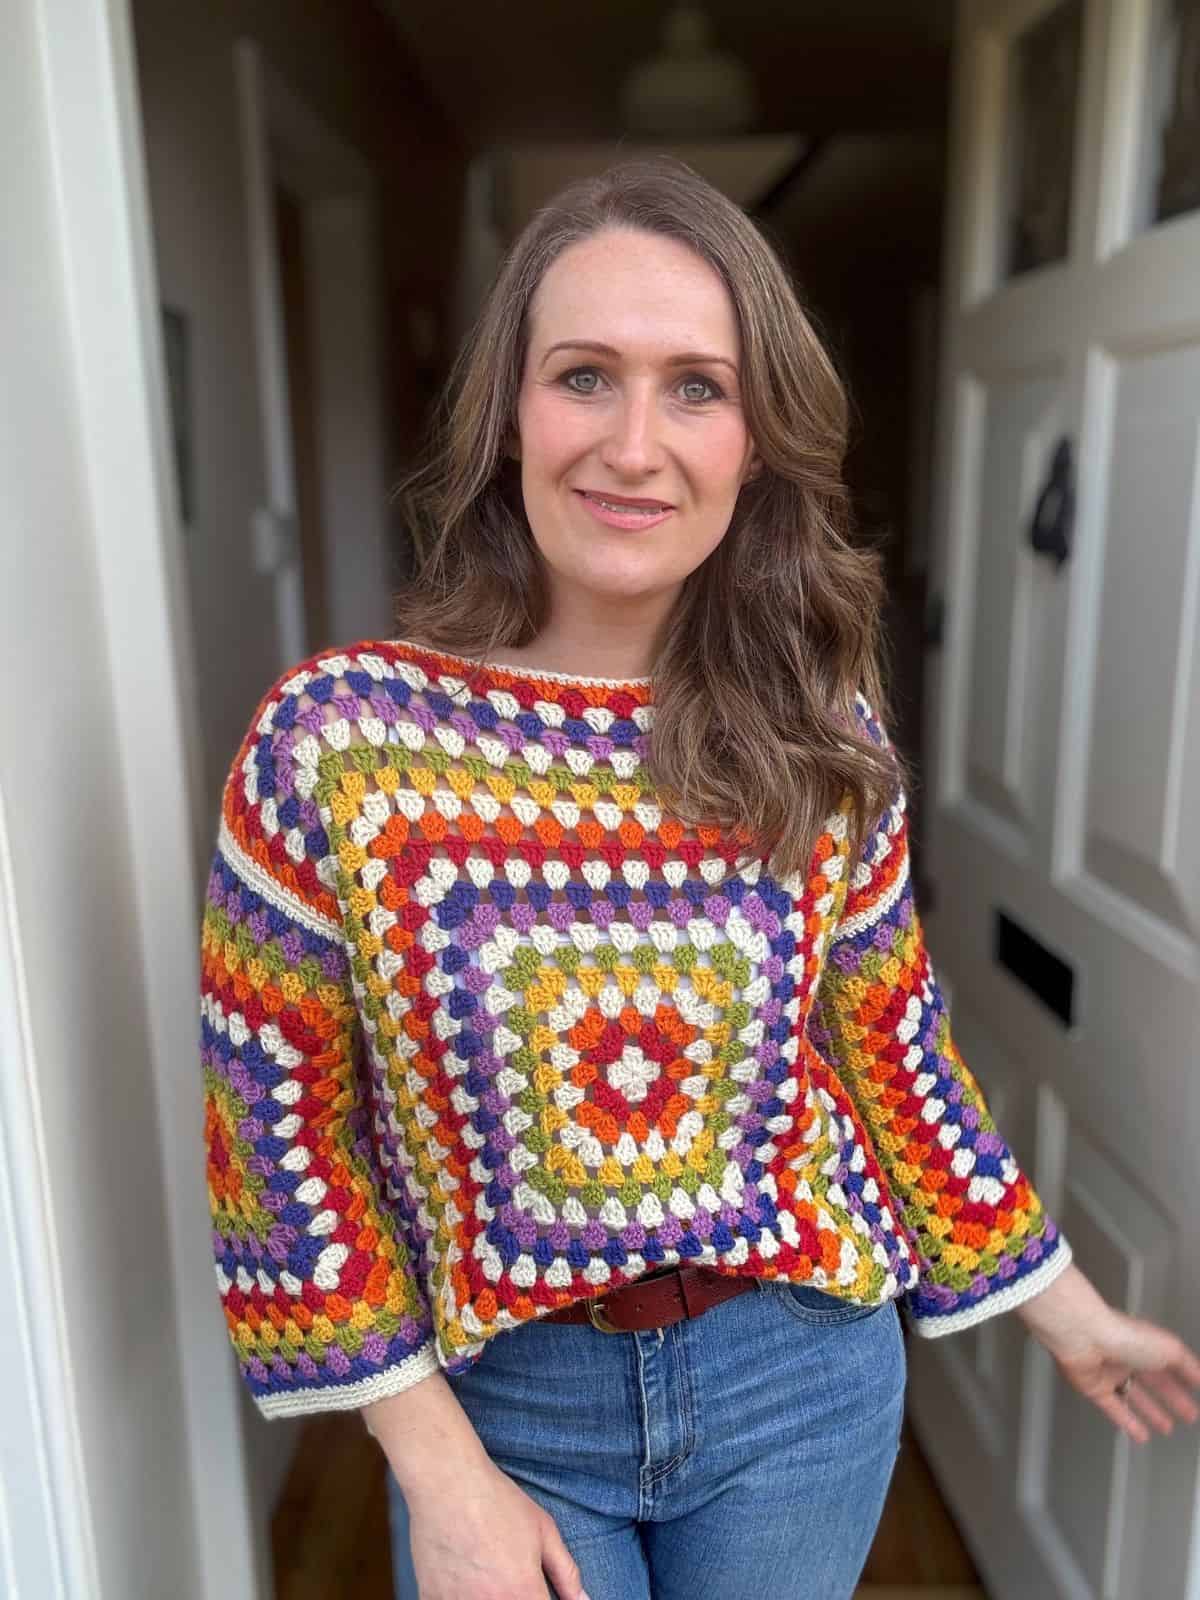
The great thing about the updated version is that it’s now in sizes XS to 5XL and comes with length options plus sleeve cuffs and a bottom rib if you like a more tailored look. I’ve made three versions so far and just look at how different they are with just colour and style changes!
If granny squares really are your thing then you might also love my Franny Granny collection of patterns that feature a granny square yoke followed by a granny stitch body:
- Franny Granny Square Sweater
- Franny Granny Square Cardigan
- Franny Granny Square Poncho
Table of Contents
Yarn
To make the updated version I used Prism DK which is 100% acrylic, 265m/290yds/100g
You’ll need the following amounts: Approx 5, (5, 5, 6, 6) (6, 7, 7, 7) balls of yarn for the sweater with ribs and cuffs. Approx 1200 (1350, 1450, 1560, 1630) (1700, 1810, 1930, 2035)yds.
I used the colour Tropics that you see in the Pink/Green/Grey version, isn’t it dreamy?!
I often get asked about ideas for alternative yarns. Here are some that I think would work really well for this granny sweater in various price ranges:
- Premier Colorfusion D, 100% Acrylic, 298m/325yds/100g
- Paintbox Yarns Simply DK 100% Acrylic, 276m/302yds/100g
- Mellowspun DK, 100% Acrylic, 260m/284yds/100g

Sizing
Sizes are as follows: XS (S, M, L, XL) (2XL, 3XL, 4XL, 5XL)
To fit chest: 30 (34, 38, 42, 46) (50, 54, 58, 62) inches
With a finished garment circumference of: 35 (39, 43, 47, 51) (55, 57, 61, 65) inches
Full schematic provided in PDF pattern.
Materials
Along with your yarn, you will need the following:
- A 4.5mm/G+ crochet hook or hook size that meets the pattern gauge
- Scissors
- Tapestry needle
- Stitch markers
Pattern Options
Scroll down and continue reading to find all the design details and sign in to view the pattern for the easy granny sweater free in this post. Or purchase the ad-free PDF in my stores:
Get this pattern ad free
Get the PDF Pattern!
Perfect to print out or use on any device, with added schematic and charts, colour inspiration and stitch tutorials.
Step by Step Video Tutorial
Come along as I crochet the granny square sweater and see just how easy it is in our step-by-step video tutorial.
Glossary and Abbreviations (US Terminology)
sc – single crochet
dc – double crochet
ch(s) – chain(s)
ss – slip stitch
RS – right side
WS – wrong side
tog – together
sk – skip
rep – repeat
fl – front loop
bl – back loop
Granny Square Sweater Pattern Notes
If you are new to making wearables (or even if you’re not!) then I’d love you to read about how to make your perfect crochet wardrobe. Planning and preparation is key and there are loads of tips and tricks that will save you time (and frogging!) here.
- Work a stacked dc or ch3 at the beg of each Round as you prefer. This counts as a stitch.
- The pattern is worked in turned rounds.
- Read through the entire pattern before beginning.
- Before you start, go through the pattern and highlight/mark the stitch and round counts that correspond to the size you are making (this will make your life much easier!).
- Make sure that you are familiar with all of the stitches in the abbreviations list before you begin.
- Instructions are given for the smallest size, with larger sizes in brackets ( ). E.g. XS (S, M, L, XL) (2XL, 3XL, 4XL, 5XL).
- If an instruction does not apply to a particular size then a – is used instead of a number. E.g. – (-, 4, 4, 5) (5, 5, 6, 6) means that the XS and S sizes do not apply to this instruction.
- Stitch counts are given in [ ] at the end of each Row or Round. If no stitch count is given, then the count is the same as the previous Row or Round.
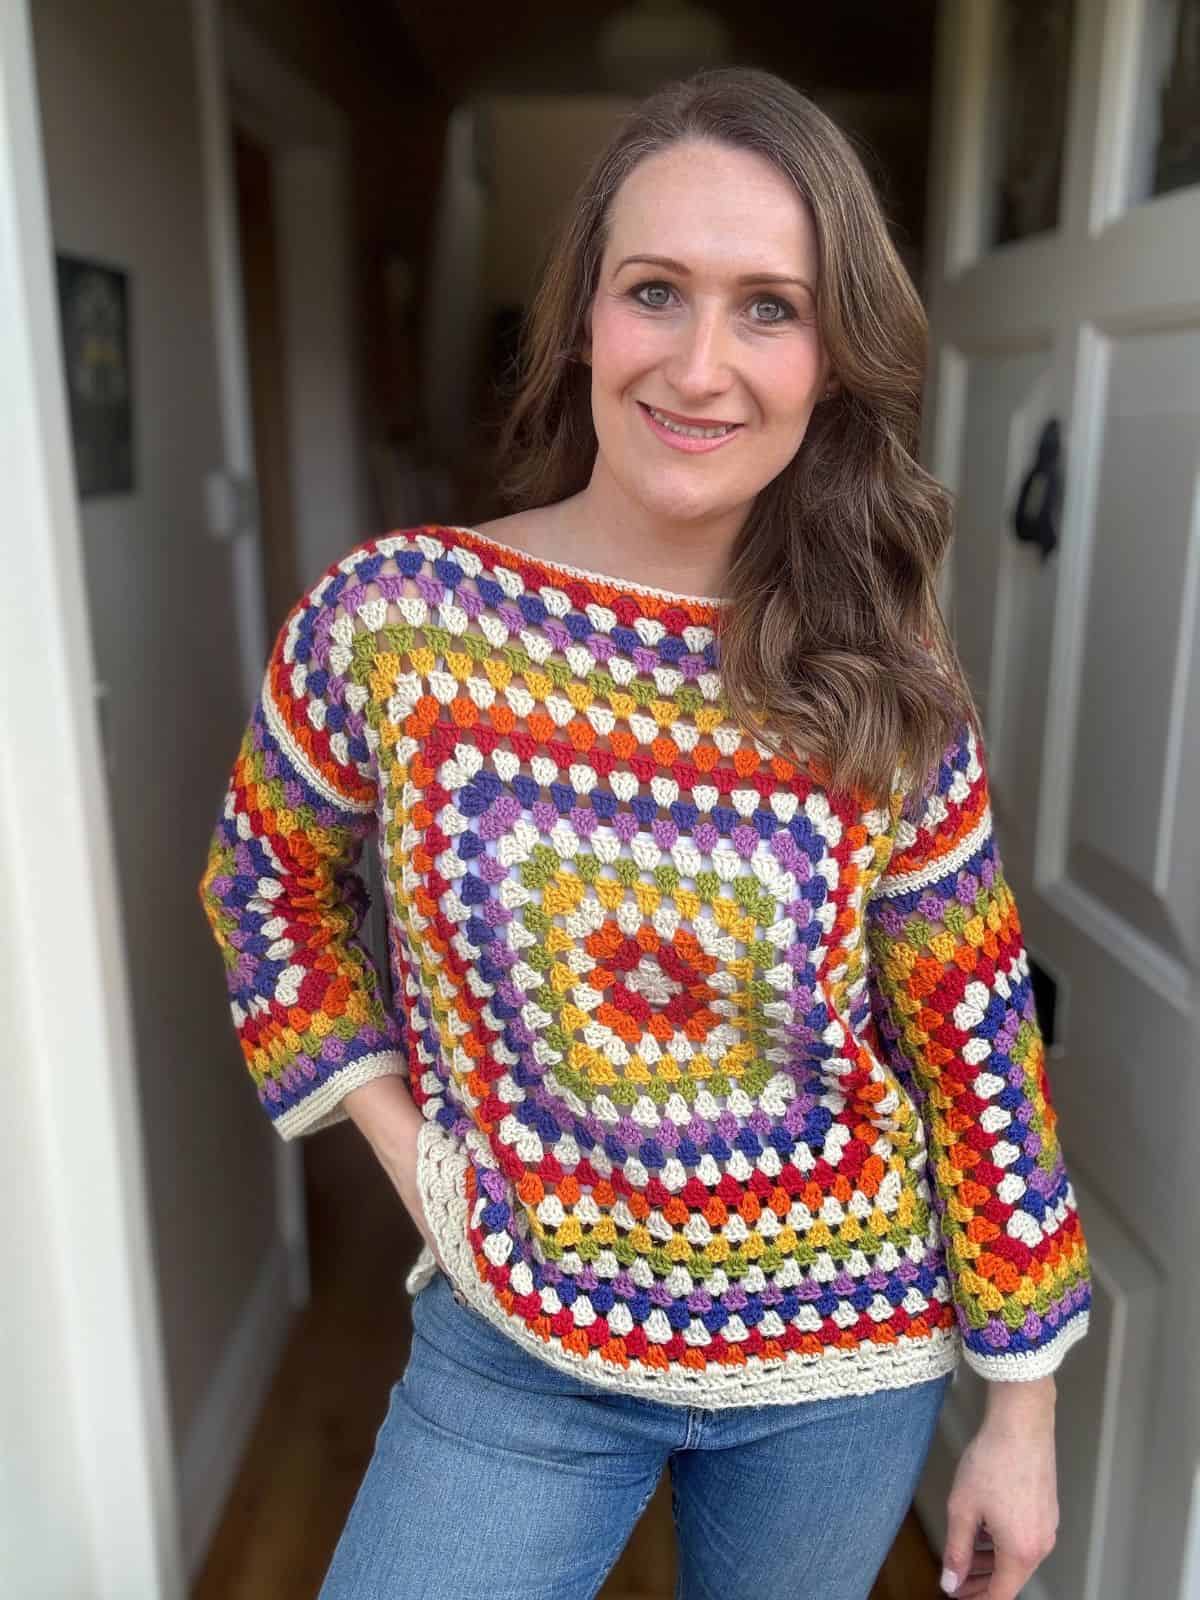
Using your chosen colours
The pattern is written for the multi colour version as pictured. But you don’t have to make yours like this!
If choosing and planning colours is something you’d like to know more about then I’d love for you to join my Using Colour In Crochet Course – it’s designed to give you all the tools you need to choose and combine the perfect colours for every project you make!
Adjusting and Customising Your Granny Sweater
LENGTH
Main Body Length: To adjust the length, you can work any length of Body Extension in rows as detailed in the pattern.
Bottom Rib: you can adjust the Bottom Rib length by working more or less stitches.
Because of the nature of the granny square, it is more likely that you will want to add length if you are making a size XS, S, M or L. All other sizes are longer.
You can of course continue your Body Extensions and make a stunning tunic or dress!
SLEEVES
Sleeve Length: You can adjust the Sleeves by working a Sleeve Extension in the same way as you did a Body Extension. Make sure to work a matching number of rounds for each sleeve.
Sleeve Cuff: you can adjust the Sleeve Cuff length by working more or less stitches.
NECK LINE
You can make your Neck opening as big or as small as you like by seaming less/more stitches on either shoulder.
Free Granny Square Sweater Pattern in Adult Sizes
There are a few options for you to access and enjoy this crochet pattern:
- View the free pattern on the blog – all blog subscribers will be able to view the patterns supported by ads by logging into their Grow account.
- Purchase the individual pattern on Etsy or Ravelry as a beautifully formatted PDF with extra stitch charts, schematic and colour information page and more!
Purchase the ad-free PDF download
Perfect to print out or use on any device, for lifetime access
Copyright Notice
The Rainbow Granny Square Crochet Pattern and its contents are fully owned and copyrighted by HanJan Crochet Ltd., and all rights are reserved.
This pattern is protected by copyright and other intellectual property laws and may not be reproduced, distributed, or transmitted in any form or by any means without the prior written consent of the author (Hannah Cross of HanJan Crochet Ltd). Unauthorised distribution or reproduction of this pattern or elements of the instructions is strictly prohibited. The free to view crochet pattern is intended for personal viewing only. By accessing this pattern, you acknowledge and agree to comply with these copyright terms and conditions.
Pattern Support
I am delighted to invite you to join the HanJan Crochet Community Facebook Group where we host all pattern support queries and love to see your progress, yarn choices and finished projects!
Free Granny Square Sweater Pattern
To unlock Exclusive Content on the HanJan Crochet Blog, all you need to do is click the box below and the Grow.me app will pop up, allowing you to enter your email and create a password.
Once you’ve created an account, every time you see Exclusive Content on my blog (or any others that use Grow), simply login to your Grow account. Be sure to switch to the login screen to enter your login credentials.
If you forget your password, click the “forgot password” link and follow the prompts. Please note that I’m unable to assist with resetting Grow passwords or accessing your Grow account, so be sure to save your login information in a safe place.
Thank you for subscribing and for joining me at HanJan Crochet! I hope you enjoy the exclusive content available on the site and I can’t wait to see what you create 🙂
SLEEVES
Make 2 matching granny squares
Sizes XS (S, M, L, XL) (2XL, 3XL, 4XL, 5XL): work to Round 14 (15, 16, 17, 17) (17, 17, 17, 17)
Sizes XS (S, M, L, XL) only
Final Round: ch1, sc in each st and ch around, ss in 1st st to join. Break yarn.
Sizes 2XL (3XL, 4XL, 5XL) only
Sleeve extension: these sizes require a number of rows of granny stitch added to the Sleeve in turned rows to increase the depth but not the length. They will become a rectangle shape. If you would like a deeper armhole depth then you can continue working rows until they are the desired size.
Size 2XL only:
Row 1: Join yarn to any ch2-sp, stacked dc in ch2-sp, *ch1, skip next 3 sts, 3dc in next ch1-sp; rep from * to last ch1-sp, ch1, skip next 3 sts, dc in next ch2-sp, break yarn.
Repeat Row 1 on the opposite side of the granny square to create a rectangle. Do not break yarn. Continue to Final Round.
Size 3XL only:
Row 1: Join yarn to any ch2-sp, stacked dc in ch2-sp, *ch1, skip next 3 sts, 3dc in next ch1-sp; rep from * to last ch1-sp, ch1, skip next 3 sts, dc in next ch2-sp, turn.
Row 2: stacked dc in 1st st, 3dc in next ch1-sp, *ch1, skip next 3 sts, 3dc in next ch1-sp; rep from * to last ch1-sp, dc in last st. Break yarn.
Repeat Rows 1 and 2 on the opposite side of the granny square to create a rectangle. Do not break yarn. Continue to Final Round.
Size 4XL only:
Work Rows 1 and 2 as per Size 3XL but do not break yarn, then continue:
Row 3: stacked dc in 1st st, *ch1, skip next 3 sts, 3dc in next ch1-sp; rep from * to last ch1-sp, ch1, skip next 3 sts, dc in next ch2-sp, Break yarn.
Repeat Rows 1-3 on the opposite side of the granny square to create a rectangle. Do not break yarn. Continue to Final Round.
Size 5XL only:
Work Rows 1-3 as per Size 4XL but do not break yarn, then continue:
Row 4: Rep Row 2. Break yarn.
Repeat Rows 1-4 on the opposite side of the granny square to create a rectangle. Do not break yarn. Continue to Final Round.
Sizes 2XL (3XL, 4XL, 5XL) only
Final Round: ch1, sc in each st and ch around, work 2sc into the side of each Sleeve Extension st, ss in 1st st to join. Break yarn.
FRONT AND BACK EXTENSION (optional)
All Sizes
If you would like to increase the length of either your Front or Back Panels (or both) then you can do so by working the following on one edge of the granny square.
If you are intending to a Bottom Rib then please make sure to work the same number of rows for your Front and Back Panel extensions. Remember that the Bottom Rib will add a further 2″ to the length.
Row 1: Working over the stitches of the Final Round: Join yarn to any ch2-sp, stacked dc in ch2-sp, *ch1, skip next 3 sts, 3dc in next ch1-sp; rep from * to last ch1-sp, ch1, skip next 3 sts, dc in next ch2-sp, turn.
Row 2: stacked dc in 1st st, 3dc in next ch1-sp, *ch1, skip next 3 sts, 3dc in next ch1-sp; rep from * to last ch1-sp, dc in last st, turn.
Row 3: stacked dc in 1st st, *ch1, skip next 3 sts, 3dc in next ch1-sp; rep from * to last ch1-sp, ch1, skip next 3 sts, dc in next ch2-sp, turn.
Repeat Rows 2 and 3 as many times as you like to get the desired length.
Before seaming it is important to block the Front, Back and both Sleeves to measurements. This will drastically improve the drape and fit of your sweater.
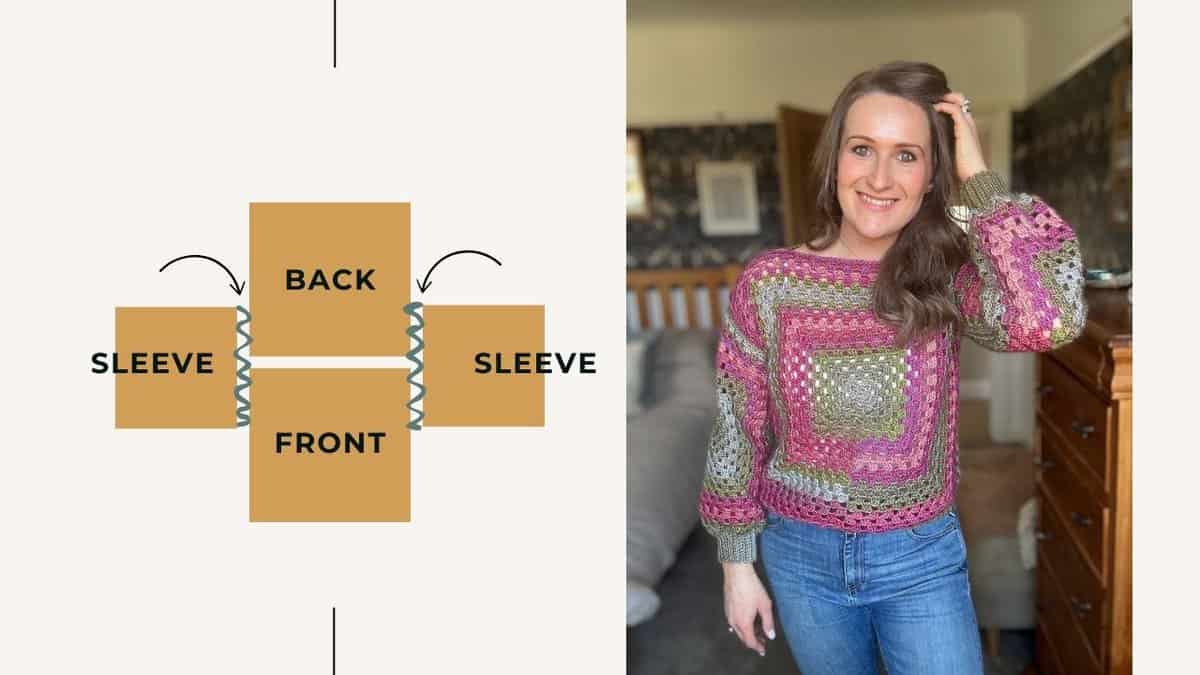
Once blocked, we begin by setting in the Sleeves. The Final Round of each panel is the RS. With the WS facing, lay out the panels as follows and seam with a slip stitch seam the Sleeves to the Back and Front as indicated:
With the sleeves now set in we can seam the underneath of the arms and sides of the body on each side. You can use a slip stitch seam or your preferred method.
With WS facing out, fold the Sweater in half at the shoulders so that the Front and half of the Sleeves are facing you. Seam the side and underarm on each side.
Finally, we need to seam the shoulders to create the neckline. This is done with a slip stitch seam to the WS of the Sweater for as many or as few stitches as you would like on either side.
Begin where the Sleeve meets the Body and work towards the neck. Work an even amount of stitches on each side. For reference I left 36 sts open at the neckline.
BOTTOM RIB AND SLEEVE CUFFS (optional)
You can now add optional Sleeve Cuffs and Bottom Rib using a Join As You Go Method.
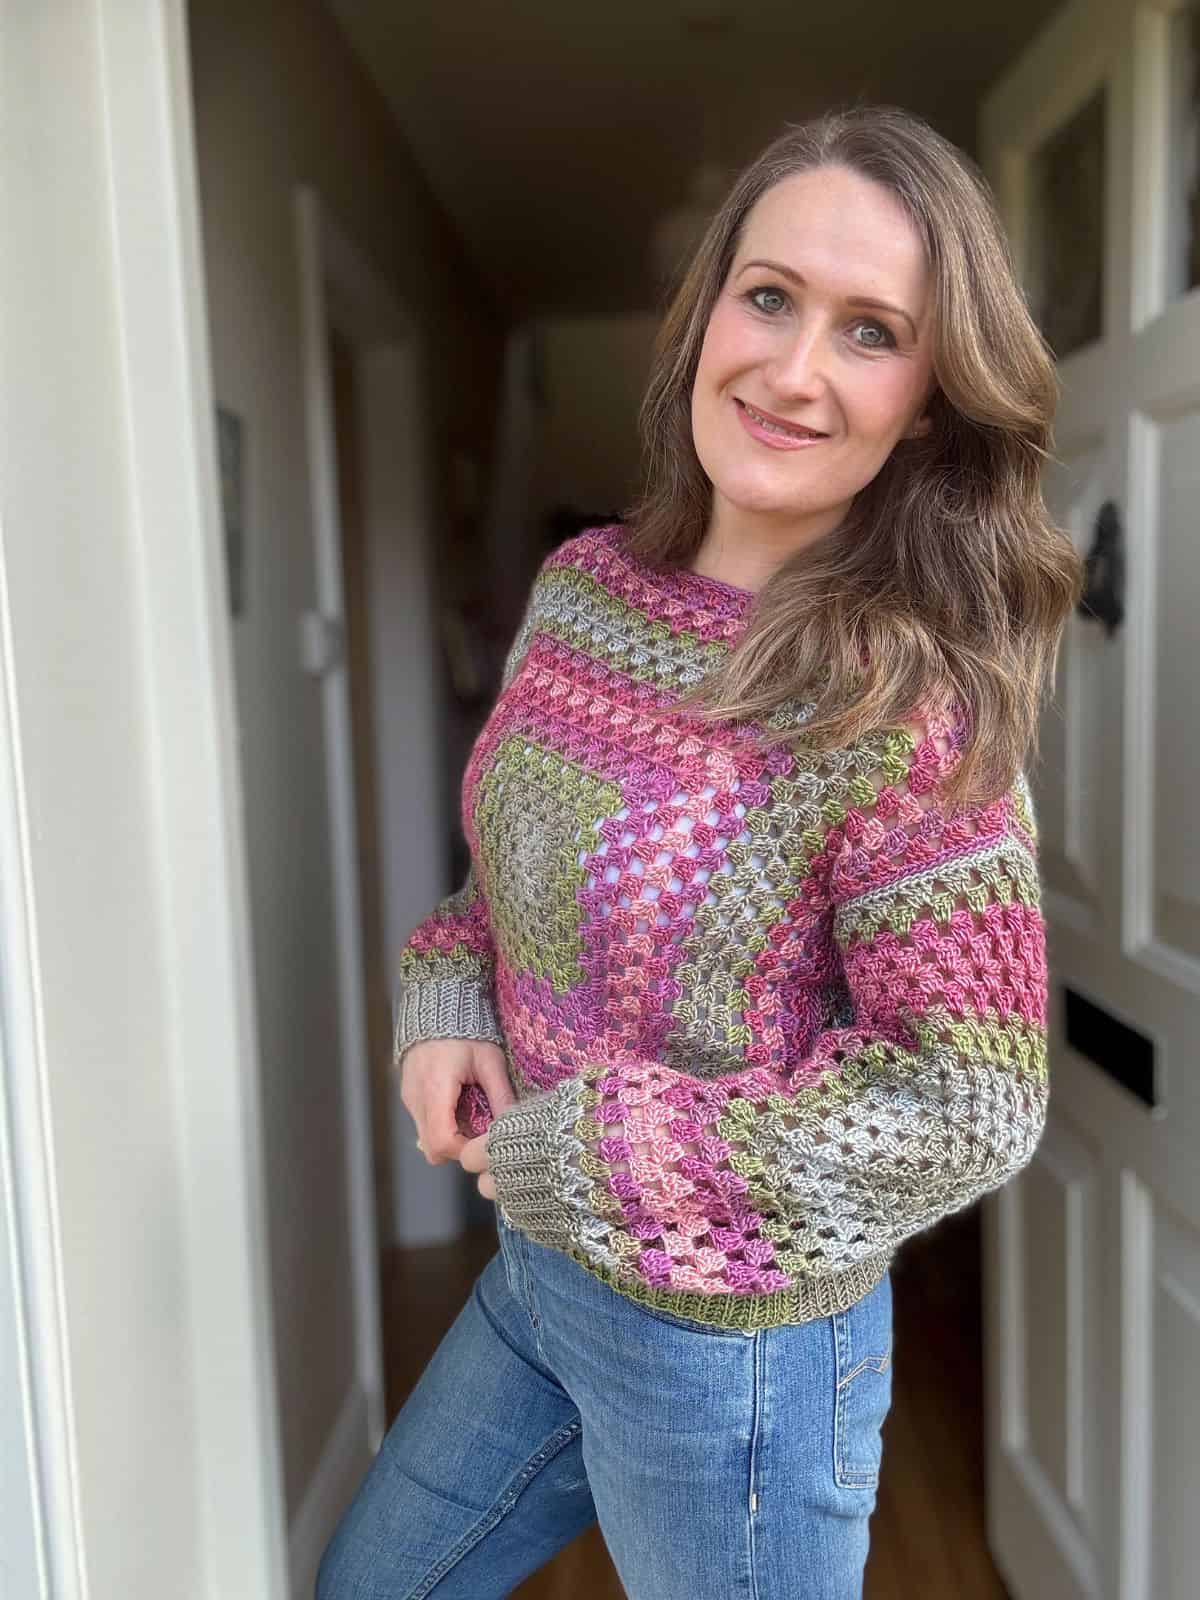
This allows you to tighten the cuffs as much or as little as you like and as you can see from the images changes the style of the Sweater to more fitted. The process for working the cuffs and rib are the same and you are able to adjust how many stitches you join to.
Sleeve Cuff:
With RS facing, join yarn to st at seam of Sleeve end. Ch11 (or however long you’d like your cuff)
Row 1: sc in 2nd ch from hook, sc in next 9chs, ss in side of next 2 sts of Sleeve, turn. [10]
Row 2: sc in blo of each st, turn.
Row 3: ch1, sc in blo of each st, skip next st of Sleeve, ss in next 2 sts of Sleeve, turn.
Repeat Rows 2 and 3 around until you have worked into the sides of all stitches of the Sleeve.
Join the last row to the first row with a ss seam to join.
You can work the other Sleeve cuff in the same way and then the Bottom Rib by joining to a Bottom side seam to begin. For the Bottom rib, only ss into 1 st when you return to the Bottom of the Sweater (unless you would like a very tapered waist of course).
Adding ribs and cuffs is a great way of styling and shaping your Sweater so feel free to experiment with joining to more or less stitches to get the tightness you would like.
Once complete, weave in all ends to finish.
Join HanJan and Share Your Crochet!
It’s an honour to be able to create and share my free crochet patterns with you. I’d love to stay connected and send you regular discount codes and free patterns! Please sign up for my subscriber list to get a free gift right now!
I look forward to seeing your finished crochet projects, especially this easy crochet pattern, so please share them with me in the HanJan Crochet Facebook group or on Instagram and tag #hanjancrochet.
Looking for pattern support?
Not only will you find pattern support in the HanJan Crochet Facebook Community Group but we have over 10,000 like minded crocheters eager to chat with you!
It is a fun, supportive and educational group where we all support each other to be the best we can be. Everyone is always happy to share their knowledge and experience so do come and join us!