This post may contain affiliate links. Please see my full disclosure and privacy policy for details.
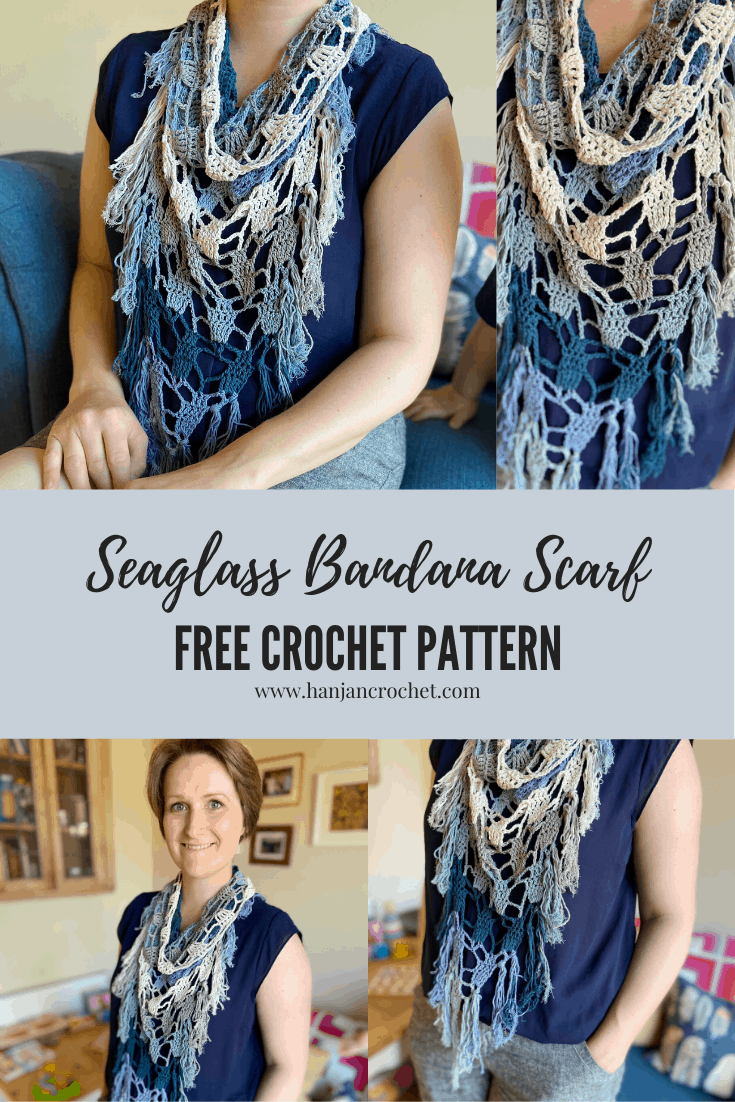
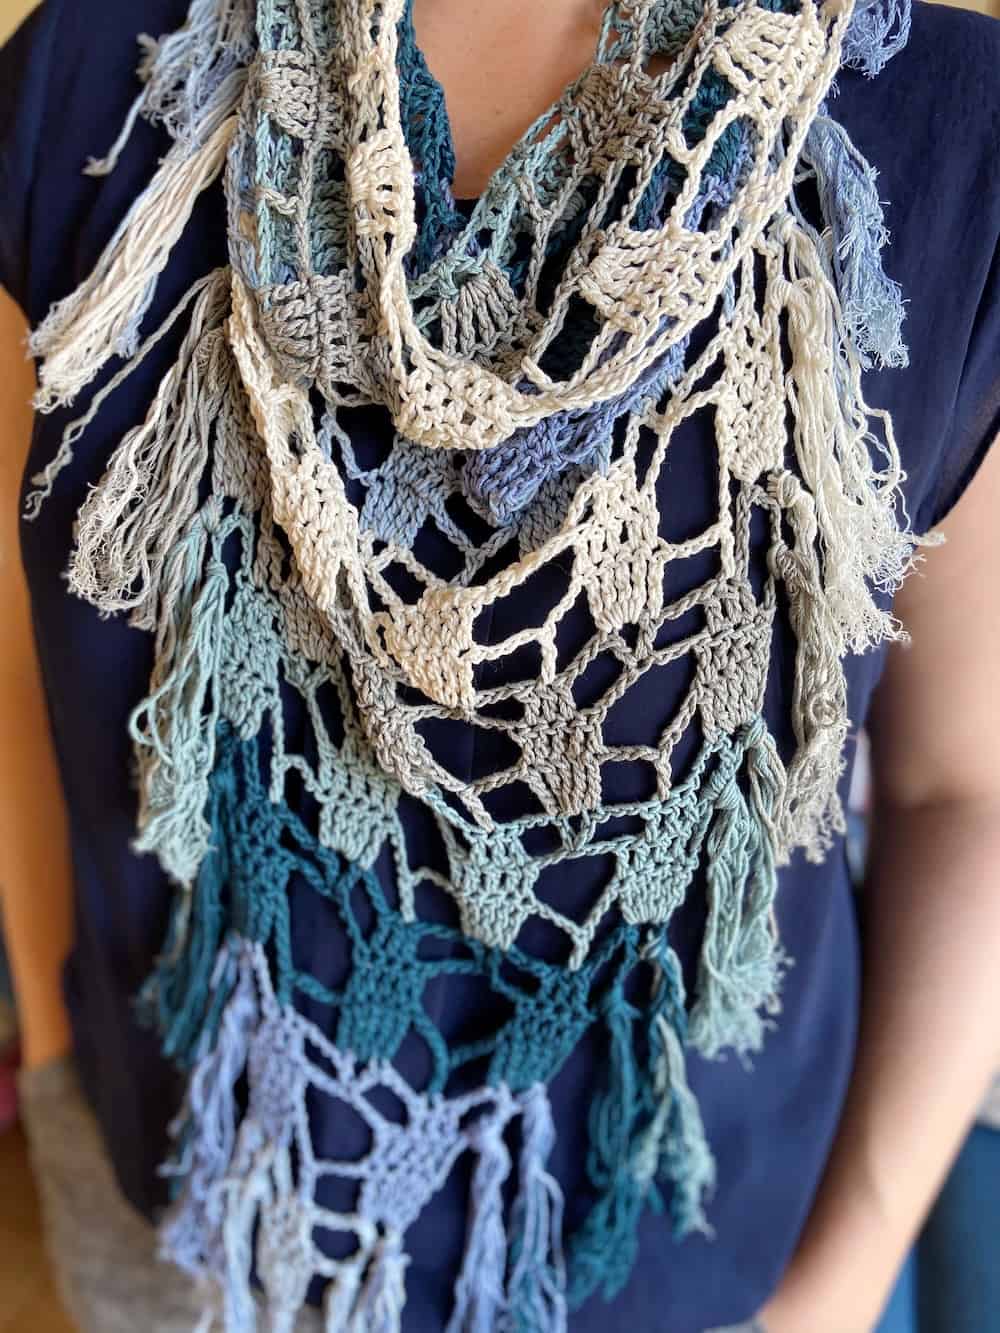
Do you have hard weeks? This week has been hard for me. Sometimes we don’t know why and sometimes it’s really obvious but either way, hard weeks are still hard. So I thought the week should end on a positive note and so I’m sharing a new free crochet pattern with you – The Seaglass Bandana Scarf.
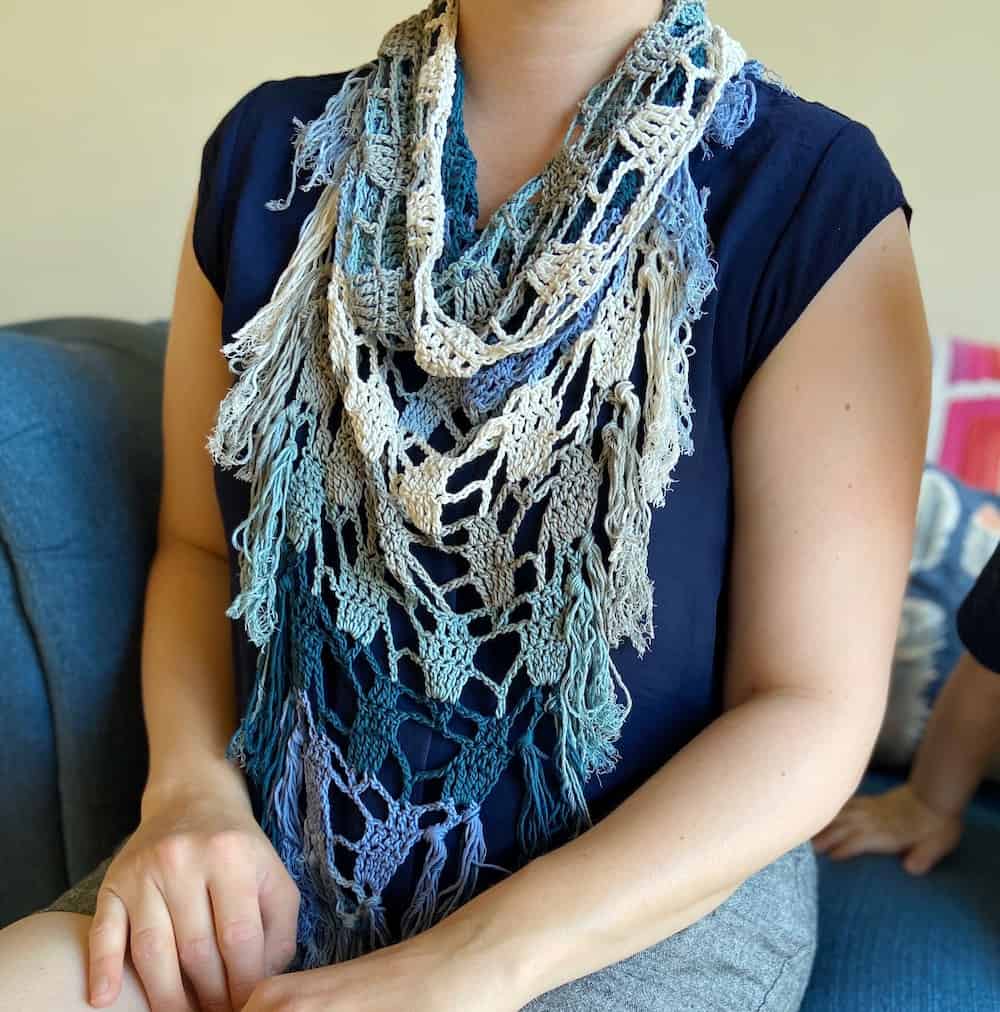
It’s a triangular lace crochet scarf that ends up with straight edges that you join to form a cowl part at the top. Sounds complicated?! I promise it’s not. Once you get the hang of the pattern repeat you’ll be just fine.
The other positive I want to take from this week is that I’ve been brave enough to have my photos taken to model the scarf! I used to think absolutely nothing of posing for crochet photos when I first started HanJan (mainly because I was convinced nobody would actually even look at them!) but more recently it’s something I’ve avoided.
Is it because my shape has changed having two beautiful babies? Is it because I’m starting to go grey?! Is it because I’m being tough on myself about how I look? Possibly a mixture of all three. However, today I’m sharing the pictures my husband took of me in this scarf because I really like them.
I like that I’ve hardly got any make up on and yet I look ok, I like that I know the smile is genuine, I like that I know there is a toddler and baby in the background getting up to all sorts and making me laugh. It is a happy photo. That’s all that matters.
My husband was recently really ill and I made a point of taking lots of photos when I could as I wanted to make sure that we didn’t forget that although it was a really hard time we were still happy. We have plenty of smiling but exhausted looking photos to look back on.
So with all of that positivity in mind I’m so very happy to share this pattern with you today. I really hope it makes you happy too.
The pattern is shared here for free in both UK and US terms but you can get an ad-free PDF of the Seaglass Bandana Scarf Crochet Pattern in my store if you would like to.
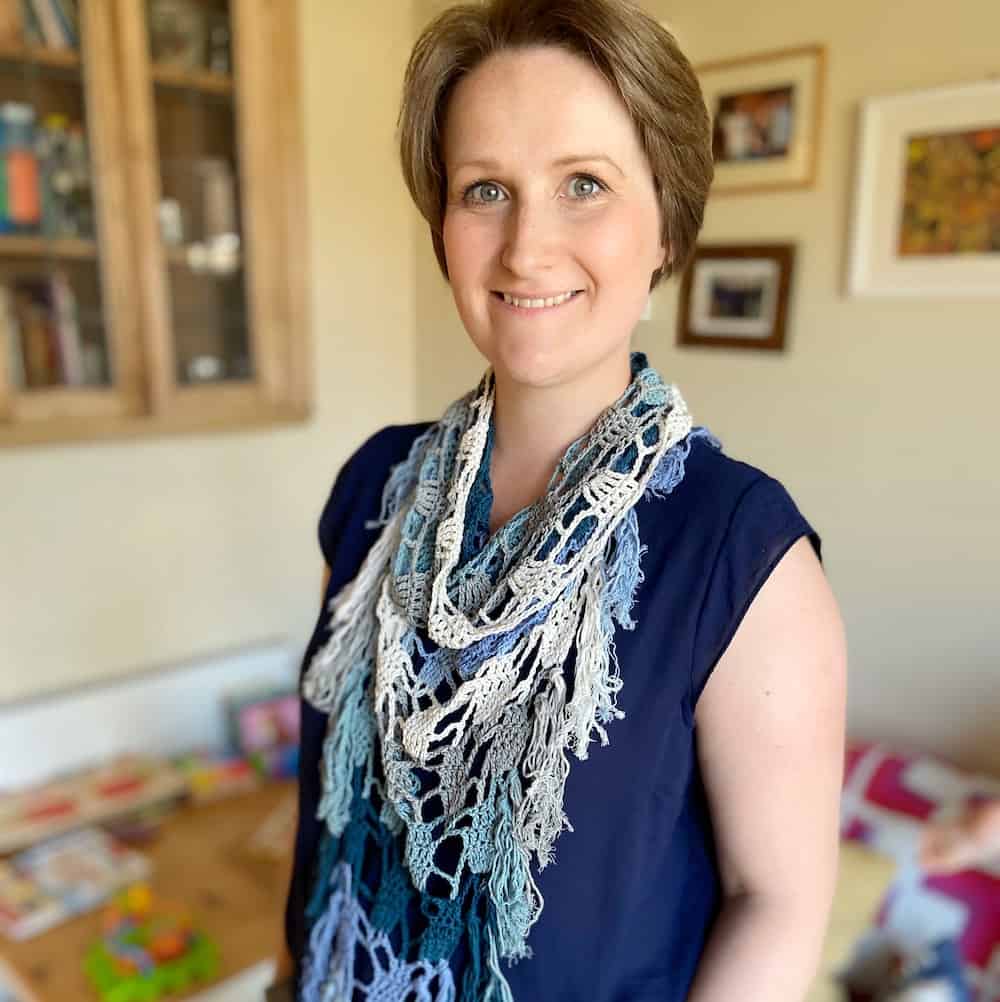
Table of Contents
If you don’t want to download the PDF then that’s absolutely fine too – read on for the full pattern for free here on this blogpost.
Click here to: Pin the Seaglass Bandana Scarf for later
Click here to: Save the Seaglass Bandana Scarf to your Ravelry queue
Yarn
I used Erika Knight Studio Linen (85% viscose, 15% linen, 50g/120m) for the crochet bandana scarf
1 skein each of Kanoko, Pyjama, Neo, Shallow, Cirrus and Milk.
If you want to make it a solid colour then 2 skeins will be enough.
Tension and Sizing
The scarf measures 75cm in length with a neck circumference of 75cm.
2 motif repeats in each direction = 10cm but tension isn’t essential
Materials
Along with the yarn you will also need:
| 4mm (US 7/G) crochet hook – my favourites are Furls Streamline Swirl crochet hooks or Clover Amour crochet hooks. |
| Tapestry needle |
| Scissors |
| Stitch markers if desired |
Notes
The scarf is worked in flat rows, then the straight edges at the top are seamed to form the cowl.
A ch3 or ch4 at the beginning of a row always counts as a tr or dtr.
Turn at the end of each row.
Special Stitch – Faux Stitch
A ch7 at the beginning of a row counts as a tr with a faux stitch above it (the faux stitch will stick up in the air and count as a ch4 at the end of next row).
Glossary/Abbreviations
ch(s) – chain(s)
ss – slip stitch
sk – skip
st(s) – stitch (es)
RS – right side
rep – repeat
sp – space
beg – beginning
Stitches –
| UK terms | US terms |
| dc – double crochet | sc – single crochet |
| htr – half treble crochet | hdc – half double crochet |
| tr – treble crochet | dc – double crochet |
| dtr – double treble | tr – triple crochet |
Pattern
(In standard UK terms – please scroll down for pattern in US terms)
To unlock Exclusive Content on the HanJan Crochet Blog, all you need to do is click the box below and the Grow.me app will pop up, allowing you to enter your email and create a password.
Once you’ve created an account, every time you see Exclusive Content on my blog (or any others that use Grow), simply login to your Grow account. Be sure to switch to the login screen to enter your login credentials.
If you forget your password, click the “forgot password” link and follow the prompts. Please note that I’m unable to assist with resetting Grow passwords or accessing your Grow account, so be sure to save your login information in a safe place.
Thank you for subscribing and for joining me at HanJan Crochet! I hope you enjoy the exclusive content available on the site and I can’t wait to see what you create 🙂
Rows 8-10 form the increase pattern.
Repeat Rows 8-10 in the following colour sequence:
11-13: Shallow, 14-16: Cirrus, 17-19: Milk, 20-22: Kanoko, 23-25: Pyjama, 26-28: Neo.
Stop increasing now and maintain pattern repeats.
Change to Shallow.
Row 29: ch4, dtr in ch2-sp, dtr in next tr, *ch4, skip (ch3 and tr), tr in next tr, ch4, skip (tr and ch3), dtr in next tr**, 3dtr in ch2-sp, dtr in next tr; rep from * ending last rep at **, dtr in last ch2-sp, dtr in 7th ch of beg ch9 from prev row [2dtr decreased at each end]
Row 30: ch3, skip st at base of beg ch3, tr in next 2 sts, *ch7, skip (ch4, tr, ch4), tr in next 5 sts; rep from * to end of row, ending last rep with tr in next 3 sts.
Row 31: ch3, skip st at base of beg ch3, tr in next tr, *ch3, skip next tr, (tr, ch2, tr) in 4th ch of ch7, ch3, skip next tr, tr in next 3 sts; rep from *to end of row, ending last rep with tr in next 2 sts.
Change to Cirrus.
Row 32: ch7 (counts as dtr and ch3), skip (tr and ch3) *dtr in next tr, 3dtr in ch2-sp, dtr in next tr, ch4, skip (ch3 and tr) tr in next tr**, ch4, skip (tr and ch3); rep from * ending last rep at ** (this last tr is worked into the top of beg ch3 from previous row)
Row 33: ch7 (counts as tr and ch4), *tr in next 5dtr, ch7; rep from * to last set of 5dtr, tr in next 5dtr, ch4, tr in 3rd ch of beg ch7 from previous row
Row 34: ch5, tr in same st at base of beg ch5 (counts as tr, ch2, tr), *ch3, skip next tr, tr in next 3 sts, ch3, skip next tr, (tr, ch2, tr) in 4th ch of ch7; rep from * to end
Change to Milk.
Rows 35-37: Rep Rows 29-31.
Fasten off.
To join, sew row-ends from Rows 29-37 to form to cowl of the bandana. Weave in all ends.
Fringe –
To make the fringe, use 5 strands of yarn approximately 25cm in length, thread through desired chain spaces at the side of the scarf and secure to create tassels. Use 5 strands of co-ordinating colour for the first tassel at the tip of the scarf. Then, use a ration of 3 strands of the row colour to 2 strands of the next row colour.
Pattern
In standard US terms.
Foundation chain: using Kanoko, ch6
Row 1: RS: dc in 1st ch of beg ch6 (counts as dc, ch2, dc) [2dc, ch2-sp]
Row 2: ch4, 3tr in ch2-sp, tr in in 4th of beg ch6 from prev row [5tr]
Row 3: ch7, ss in 2nd ch from hook, ss in next 3ch (this creates the faux stitch that will stick up in the air and counts as ch4 for next row), skip st at base of beg ch7, dc in next 3 sts, dc in top of beg ch4 from prev row [5sts]
Row 4: ch9 (counts as ch4, dc, ch2), dc in 5th ch of beg ch9, ch3, skip st at base of beg ch9, dc in next 3 sts, ch3, (dc, ch2, dc) in tip of faux stitch from prev row [7dc, 2 ch2-sps, 2 ch3-sps] Change to Pyjama.
Row 5: ch4, 3tr in ch2-sp, tr in next dc, ch4, skip next (ch3 and dc), dc in next dc, ch4, skip next (dc and ch3), tr in next dc, 3tr in ch2-sp, tr in 7th ch of beg ch9 from prev row [10tr, 1dc, 2 ch4-sps]
Row 6: ch7, ss in 2nd ch from hook, ss in next 3ch (creates faux stitch), skip st at base of beg ch7, dc in next 4 sts, ch7, skip (ch4, dc, ch4), dc in next 4 sts, dc in top of beg ch4 from prev row [10dc, 1 ch7-sp]
Row 7: ch9 (counts as ch4, dc, ch2), dc in 5th ch of beg ch9, ch3, skip st at base of ch9, dc in next 3 sts, skip next dc, ch3, (dc, ch2, dc) in 4th ch of ch7, ch3, skip next dc, dc in next 3 sts, ch3, (dc, ch2, dc) into tip of faux stitch from prev row [12dc, 3 ch2-sps, 4 ch3-sps] Change to Neo.
Row 8: ch4, 3tr in ch2-sp, tr in next dc, *ch4, skip next (ch3 and dc), dc in next dc, ch4, skip next (dc and ch3), tr in next dc, 3tr in ch2-sp, tr in next dc; rep from * to end working the last tr of last rep into 7th ch of beg ch9 from prev row [15tr, 2dc, 4 ch4-sps]
Row 9: ch7, ss in 2nd ch from hook, ss in next 3ch (counts as faux stitch for next row), skip st at base of beg ch7, dc in next 4 sts, *ch7, skip (ch4, dc, ch4), dc in next 5 sts; rep from *to end, working last dc of last rep in top of beg ch4 from prev row [15dc, 2 ch-7sps]
Row 10: ch9 (counts as ch4, dc, ch2), dc in 5th ch of beg ch9, skip st at base of beg ch9, ch3, dc in next 3 sts, *ch3, skip next dc, (dc, ch2, dc) in 4th ch of ch7, ch3, skip next dc, dc in next 3 sts; rep from * to faux stitch at end, ch3, (dc, ch2, dc) into the tip of faux st from prev row [17dc, 4 ch-2sps, 6 ch3-sps]
Rows 8-10 form the increase pattern.
Repeat Rows 8-10 in the following colour sequence:
11-13: Shallow, 14-16: Cirrus, 17-19: Milk, 20-22: Kanoko, 23-25: Pyjama, 26-28: Neo.
Stop increasing now and maintain pattern repeats.
Change to Shallow.
Row 29: ch4, tr in ch2-sp, tr in next dc, *ch4, skip (ch3 and dc), dc in next dc, ch4, skip (dc and ch3), tr in next dc**, 3tr in ch2-sp, tr in next dc; rep from * ending last rep at **, tr in last ch2-sp, tr in 7th ch of beg ch9 from prev row [2tr decreased at each end]
Row 30: ch3, skip st at base of beg ch3, dc in next 2 sts, *ch7, skip (ch4, dc, ch4), dc in next 5 sts; rep from * to end of row, ending last rep with dc in next 3 sts.
Row 31: ch3, skip st at base of beg ch3, dc in next dc, *ch3, skip next dc, (dc, ch2, dc) in 4th ch of ch7, ch3, skip next dc, dc in next 3 sts; rep from *to end of row, ending last rep with dc in next 2 sts.
Change to Cirrus.
Row 32: ch7 (counts as tr and ch3), skip (dc and ch3) *tr in next dc, 3tr in ch2-sp, tr in next dc, ch4, skip (ch3 and dc) dc in next dc**, ch4, skip (dc and ch3); rep from * ending last rep at ** (this last dc is worked into the top of beg ch3 from previous row)
Row 33: ch7 (counts as dc and ch4), *dc in next 5tr, ch7; rep from * to last set of 5tr, dc in next 5tr, ch4, dc in 3rd ch of beg ch7 from previous row
Row 34: ch5, dc in same st at base of beg ch5 (counts as dc, ch2, dc), *ch3, skip next dc, dc in next 3 sts, ch3, skip next dc, (dc, ch2, dc) in 4th ch of ch7; rep from * to end
Change to Milk.
Rows 35-37: Rep Rows 29-31.
Fasten off.
To join, sew row-ends from Rows 29-37 to form to cowl of the bandana. Weave in all ends.
Fringe –
To make the fringe, use 5 strands of yarn approximately 25cm in length, thread through desired chain spaces at the side of the scarf and secure to create tassels. Use 5 strands of co-ordinating colour for the first tassel at the tip of the scarf. Then, use a ration of 3 strands of the row colour to 2 strands of the next row colour.
If you enjoyed this then here are some other free patterns you might enjoy too:
Thank you so much for being here and supporting my blog. It’s such an honour to be able to create and share my craft with you. If you’d like to, I’d love for you to sign up to my email address so that I can share more with you.
